|
Projects | Guides | Gallery | Articles | Contact |

|
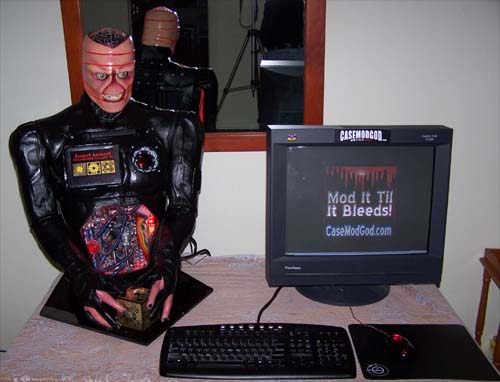
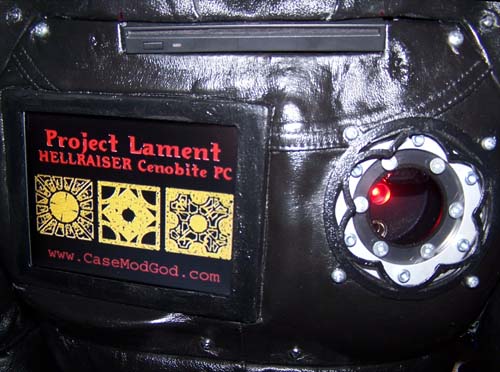
Work Log Page: [1] - [2] - [3] - [4] - [5] - [6] - [7] - [8] - [9] 06/08/2005 Update... Finished? I am not going to worry about the slimline CDRW/DVD drive being broken for now, I can replace that later and use the USB 2 CDRW/DVD drive to install Windows on it later tonight or tomorrow and post some more pics. 07/11/2005 Update I swapped in a Geforce 6200 for the Radeon 9250 and also replaced the broken slim line cdrw/dvd drive. Here he is hooked up to my monitor, sitting next to the mod it looks smaller than 21". It is hard to capture the lighting and effects on camera as good as they look in person...
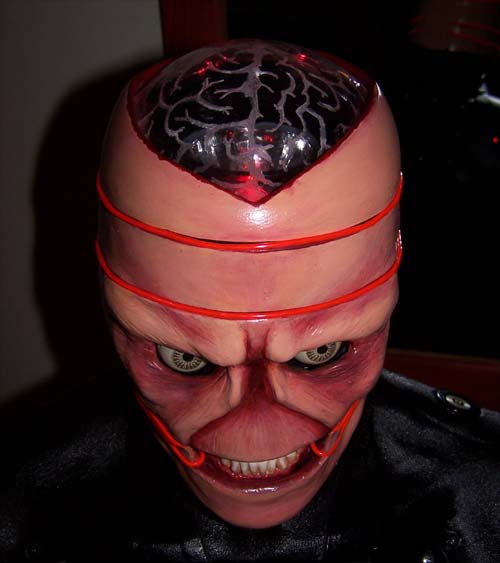
Profile shot to show sculpting and painting detail of the head, the glo-wire is not glued down but fits tight and can be removed if needed.
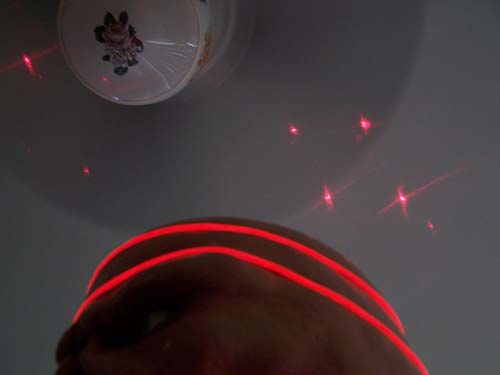
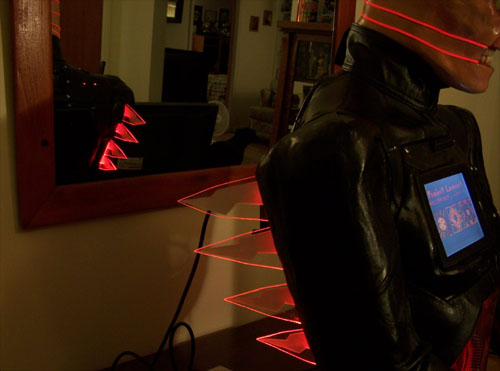
Top down showing the laserpod and laser LED shining up the brain etch, also below is a good representation of the brightness of the red glo-wire. Continuing down past the neck is a CD ejected from the new drive and the top of the LCD monitor.
Here is a shot of the ceiling... mmmm, lasers.
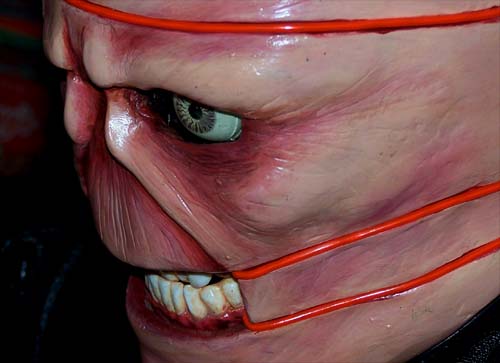
Close up to show detail around the eyes...
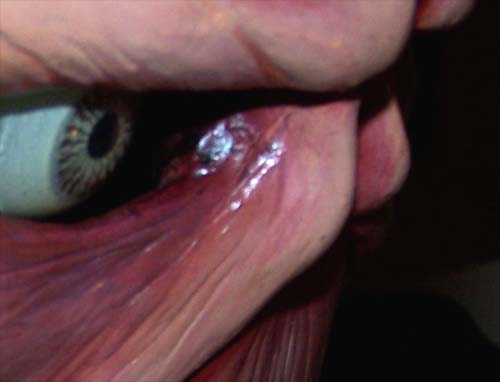
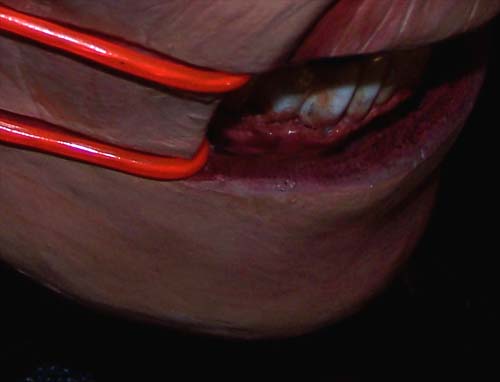
Close up to show detail around the mouth...
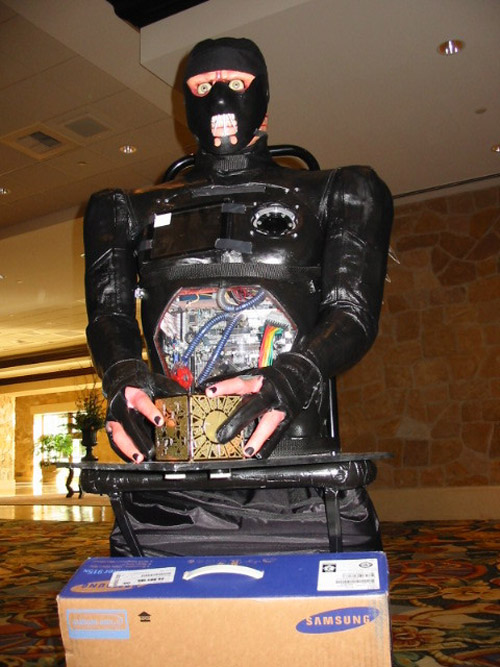
Creepy...
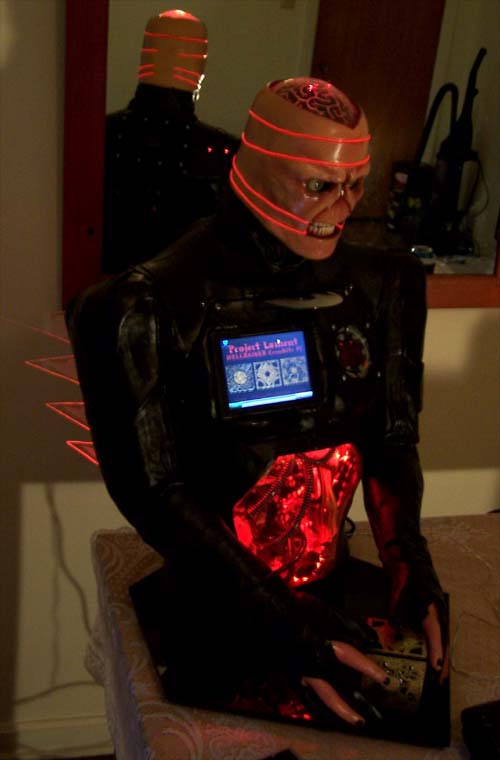
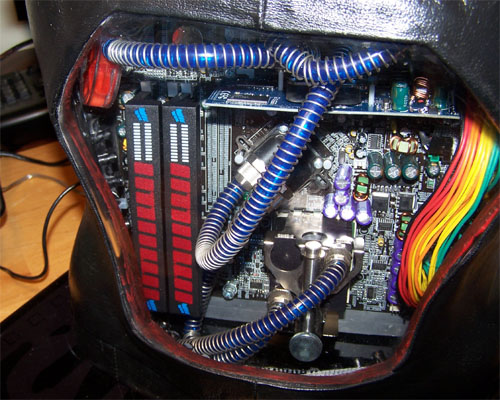
The 6" LCD monitor up and running inside the completed and fully functioning chest section.
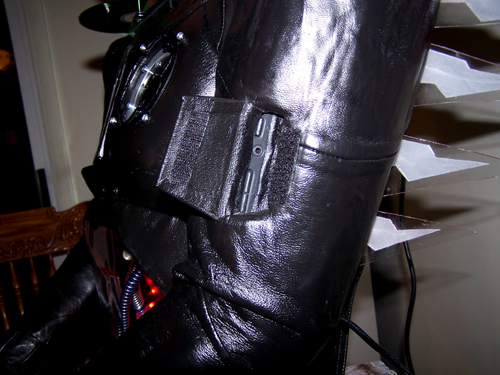
I had to make a trap door in the arm to access the power and volume buttons for the speakers as well as the headphone plug
A cut piece of a milk jug, leather scraps, velcro and liquid electrical tape make for a pretty spiffy door.
Here he is evilly eyeballing the vacuum cleaner in the corner... damned vacuum.
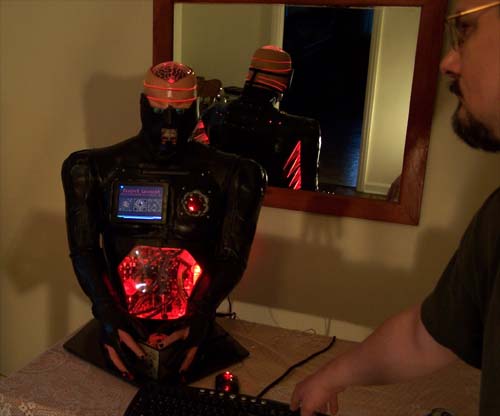
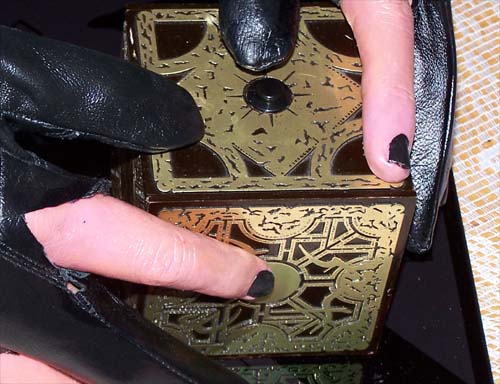
A shot of me pressing the button to make the eyes glow...
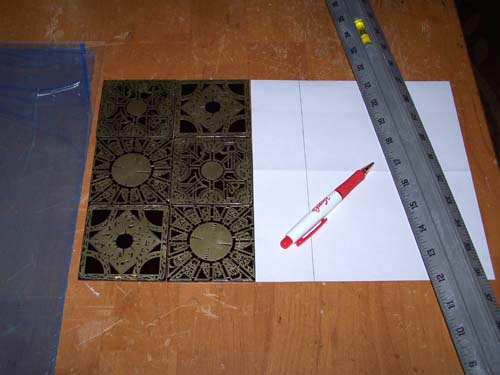
08/05/2005 Update: Making a Mouse Pad... Well, good enough never is and the "mod it til it bleeds" mentality made me mod more. I now have a modded two wheel hand truck to make transporting the mod easier, and the finishing touch to round out the mod... a custom mousepad. I had a broken puzzle box that was crying to become something, so I sanded all the sides of each piece of the box to the edge of the pattern and lined them up. Together the six pieces were not quite large enough to provide a decent mousing surface so I decided to use plexi glass to fill in the rest of the mouse pad and black Krylon fusion (I was out of vinyl dye) to make it all match up.
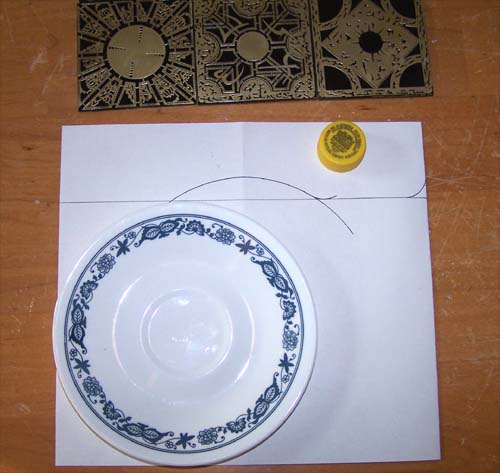
I like to use folded paper to help me figure stuff out, paper also makes for good templates once everything is measured out.
After I got the size of the mousepad figured out I used a soda cap and a small plate to add the needed curves onto the piece of paper and then cut out a template.
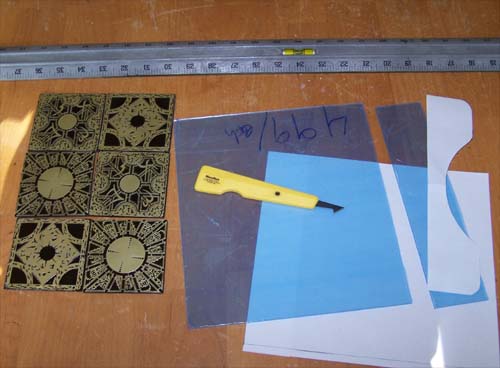
If you are a serious modder and don't own a plexi cutter you need to update your mod toolbox, I cut a piece of plexi big enough wrist rest section and also a piece for the base.
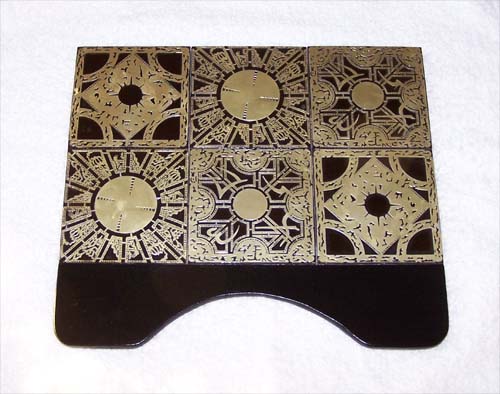
Leap of faith time, I used a Dremel with a ripsaw blade to cut everything to shape, glued it all down, then filed and sanded everything to fit. I rough sanded then sprayed the black Krylon Fusion onto the wrist rest section and also the back of the mouse pad. I will add some non slip black crap to the back of it tomorrow and this mod is DONE. If you are wondering if the mouse will track on the surface of a puzzle box the answer is yes, it works surprisingly well with my Logitech MX510 without skipping or jumping at all. Below is the finished product.
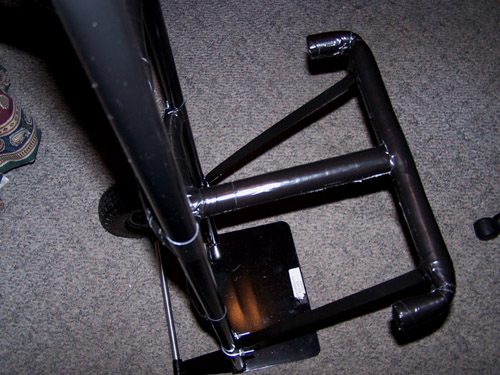
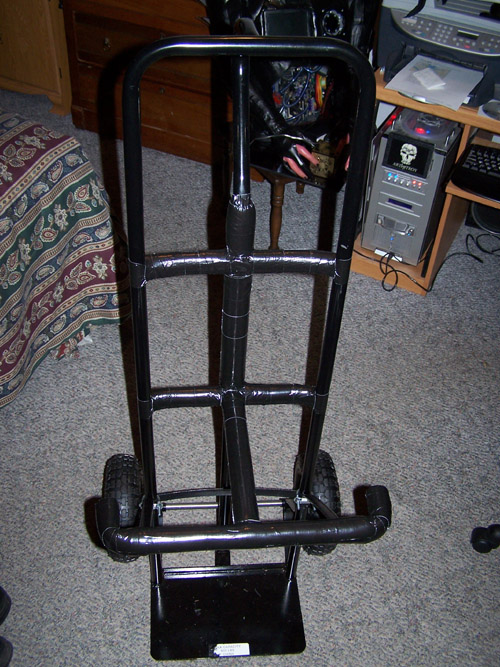
Below is the modded two wheel hand truck that the mod sits on, it makes transporting it a lot easier and looks sweet too.
Here is a front shot of the padded and modded hand truck...
Finally a picture of the mod, monitor and gear being wheeled into QuakeCon2005 using the modded two wheel hand truck.
09/27/2005 Update... Fixing a few issues.
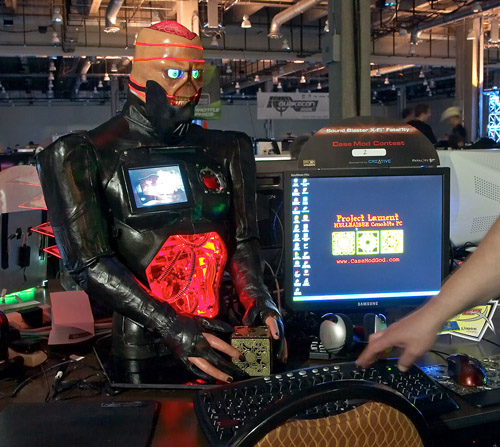
Taking my mod to QuakeCon 2005 was awesome, the amount of attention the mod received and winning first place in the QuakeCon Creative case mod competition made all the months of work involved creating it entirely worth it.
Sadly, there was also a design flaw made apparent by taking my mod to Texas, that being the power button on the puzzle box. People like to push buttons (bastards) and it is my own fault for not taking that fact into account when I chose to put the power button where I did, but that is a minor annoyance compared to this next bit....
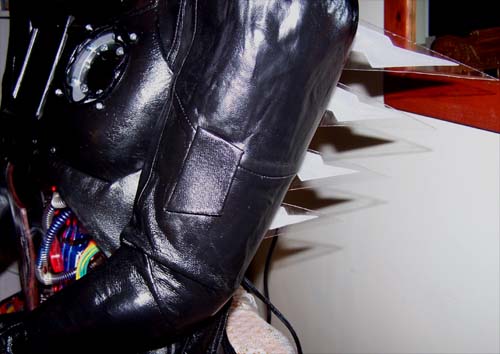
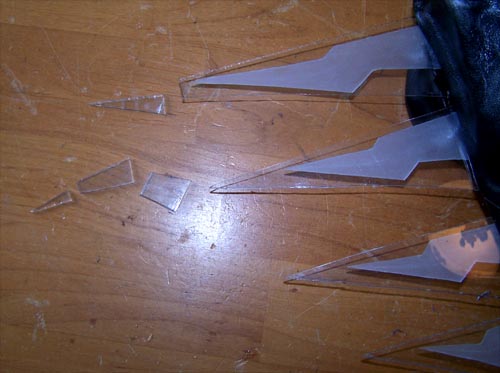
During the trip home when I was almost forced off the expressway by a merging semi, I cut the wheel left and then right to prevent an accident and heard crunching and snapping noises from the back of the van... so not good. I pulled over to check the damage and saw that the top plexi glass spikes had shattered at the tips... both of the top spikes on each arm had varying degrees of damage ranging from bad to worse.
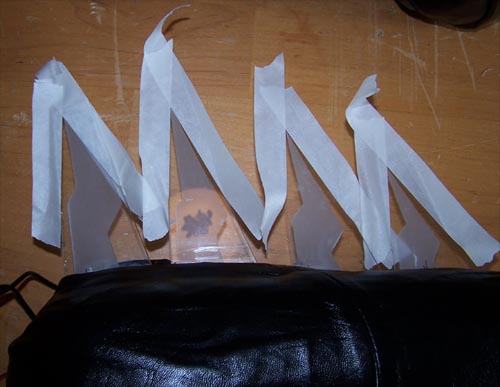
Damage repair comes before fixing the power button design flaw, so when I got home I tried gluing the acrylic back together (after I found all the small pieces scattered across the van floor)... but it was futile, the glue mended plexi was weak both in structure and appearance. After thinking it over for a while I decided that the only way to fix the "wings" would be to do more cutting on them, the left breakage was the worst as it was down past the etched zig zag spike.
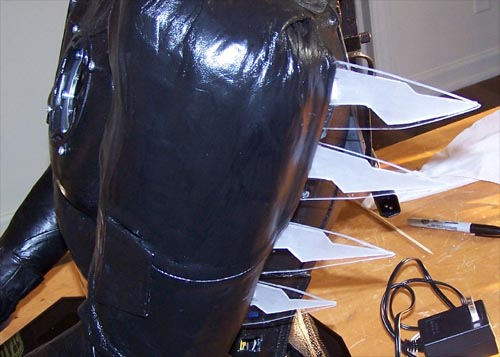
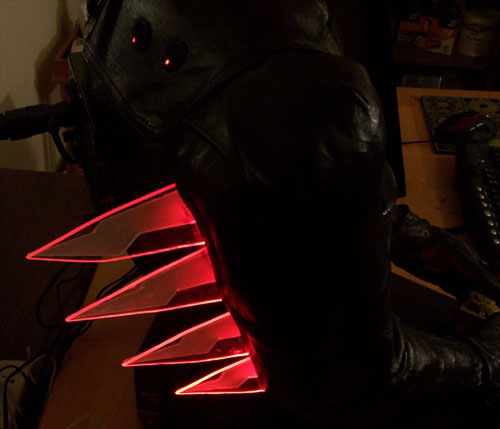
As you can see in the above and below pictures the re-cut spikes are now more random in appearance compared to before with the etched and clear layers now meeting up at the tips of the spikes.
The spikes don't stick out as far now and if the mod were to roll again during transport it would not cause any further damage to them.
10/10/2005 Update... Upgrades and Improvements. One of the first questions everyone at QuakeCon asked (after how long it took) was "what's in it?", the updated hardware list is at the end of the page. I decided to upgrade the processor in the Lament mod from the Athlon XP 2600+ 333FSB to an Athlon XP 3000+ 400FSB. I won the Corsair rig of the month and they sent me a 1GB PC3200 XMS Expert kit (with the programmable readout) and it will be going into the mod to replace the Kingston HyperX 512MB PC2700 that is currently installed.
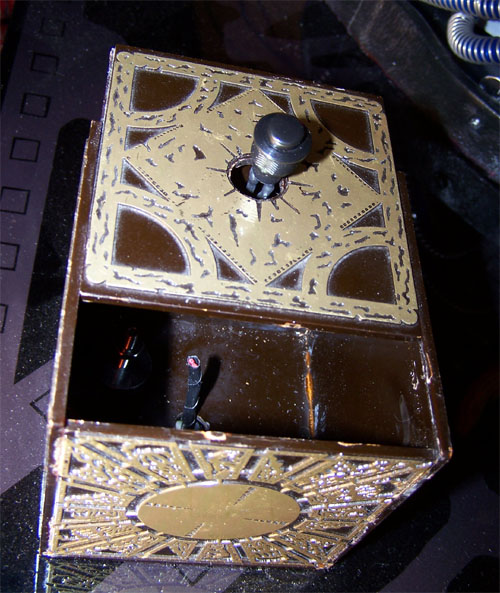
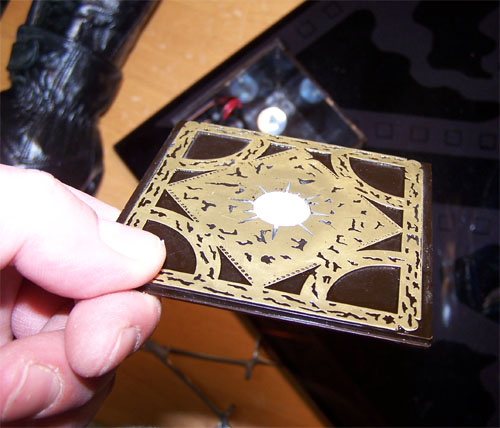
Next up, moving the button from the top of the puzzle box. First I cut the wires and removed the button.
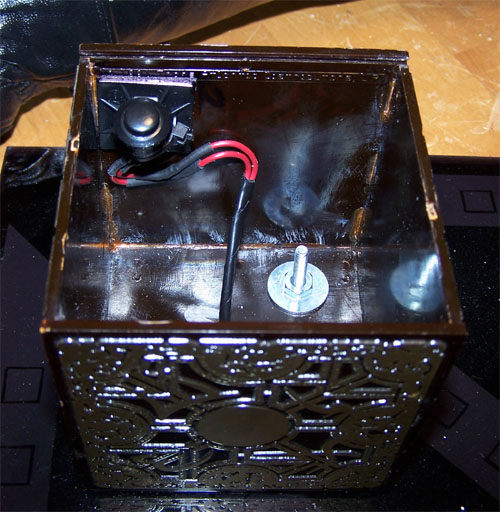
I reattached the wires and used a square adhesive backed mounting base and a zip tie to hold the button in its new stealthed location inside the front corner of the box.
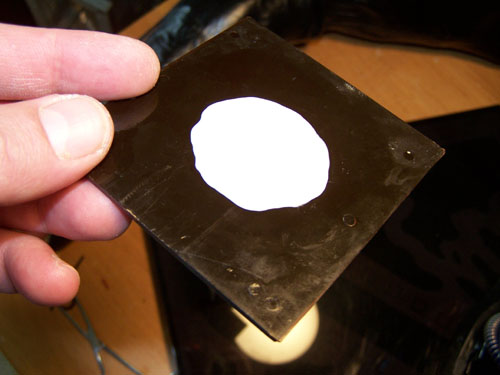
To plug the hole where the button was I used a small amount of Magic Sculp and pressed it down flat.
On the back side I smoothed it down as level as I could get it, once it dried I filed it down almost smooth to the plastic.
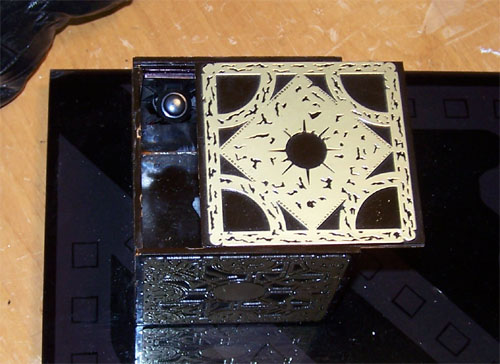
The repair was then painted black with model enamel paint and after everything was dry the box was reassembled. Below shows the open box and power button.
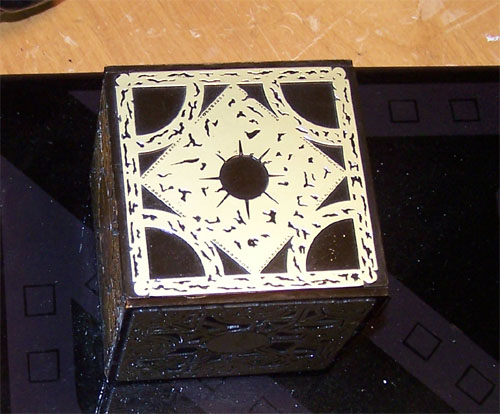
With the box closed the power button is now safely tucked away.
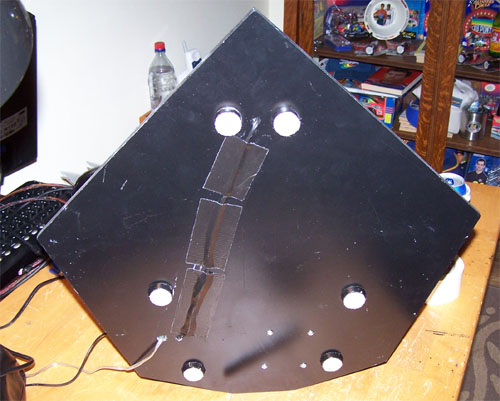
The bottom of the mods base is vinyl dye and paint, I have not scratched it yet but since it is only a matter of time before it gets damaged I decided to protect the base with a layer of black felt.
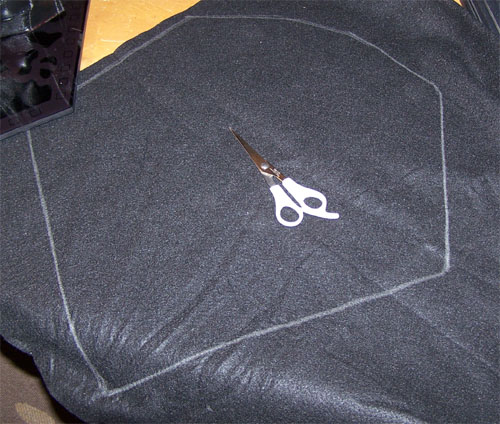
First, I traced the outline of the mod onto the felt using a silver sharpie marker. Next I cut the felt smaller than the tracing by about 1/2" inside of the lines.
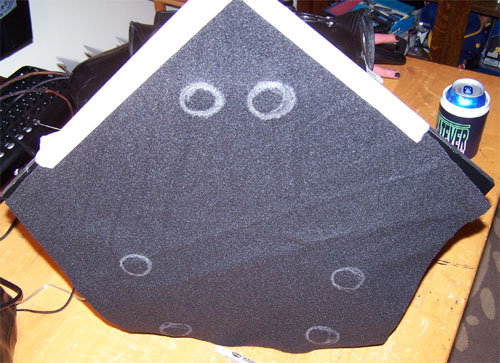
Masking tape to hold the felt in place so I can trace the feet location onto it, then the holes were cut out.
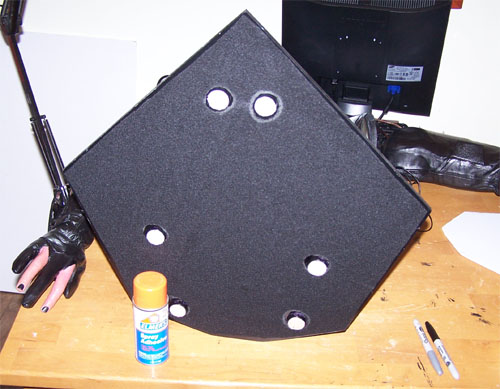
The edges were masked off to 1/2" from the outer edge, the feet were masked off as well and the base gets a coat of spray adhesive. Spray adhesive was also coated onto the mating side of the felt and it was carefully attached. Even though it will never be seen it looks good and the paint job is protected too.
|
|
|