|
Projects | Guides | Gallery | Articles | Contact |

|
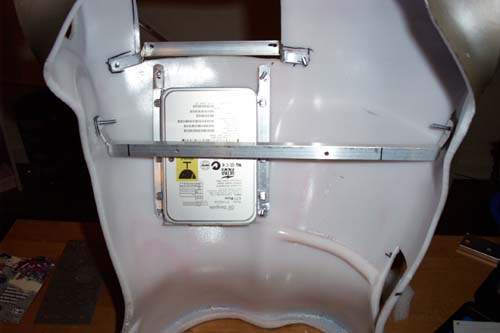
Work Log Page: [1] - [2] - [3] - [4] - [5] - [6] - [7] - [8] - [9] 11/17/04 Mounting the HDD Like making brackets to mount the hard drive, as seen below. I used an old 4GB drive as a template to get everything lined up, the IDE and power cables will connect at the bottom of the drive behind the motherboard tray.
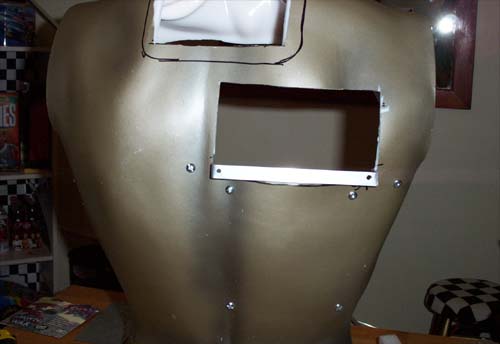
A gratuitous parting shot of the back, almost all the cutting to this part of the torso is finished. Once I order the water cooling components (mainly the radiator) the final cuts can be made to the main section which will be sanded, vinyl dyed and then set aside to await final pre assembly detailing.
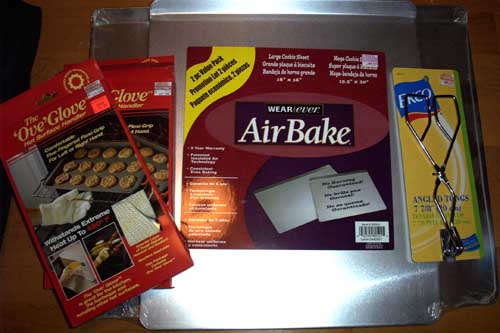
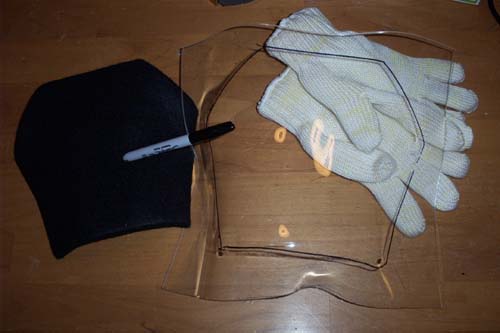
Next up, some fun stuff. Cutting and forming the window for the abdomen section and mounting the 6" LCD to fit through the chest. 11/21/04 Minor Update... I bought a few more supplies for the mod, a pair of 'Ove' gloves, a couple of baking sheets and some tongs... hmmm, holiday baking?
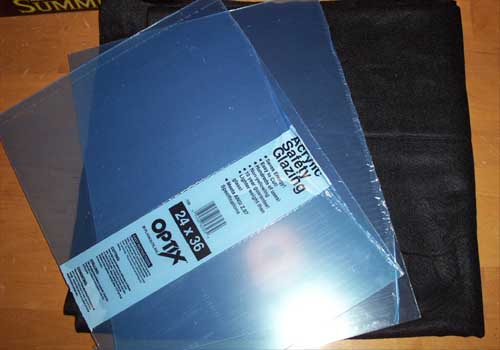
No, I am going to heat some plexi-glass and form the curved abdomen window. Under the plexi in the picture below is some felt that will be used to hopefully prevent scratches as I form it to the mannequin belly.
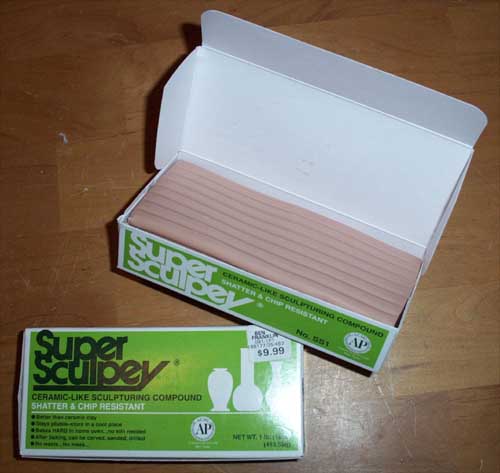
Last but not least, Super Sculpey. After the windowing and cutting of the abdomen and chest I will begin sculpting the head.
11/23/2004 Did more stuff... And in preparation I positioned and then mummified the skull model with masking tape, it will soon be covered in foil and Sculpey... it looks kinda cool as is though and I can't wait to start the hard part, sculpting. It will however have to wait because I am trying to concentrate on the chest mods.
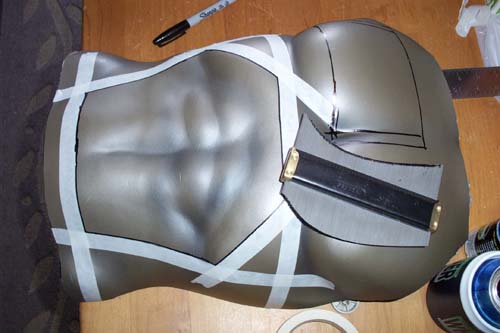
As I mentioned before, cutting straight lines into a contoured surface isn't easy so I bought a contour guide and set about cutting a hole for the LCD. I also taped off and outlined the abdomen window cut out.
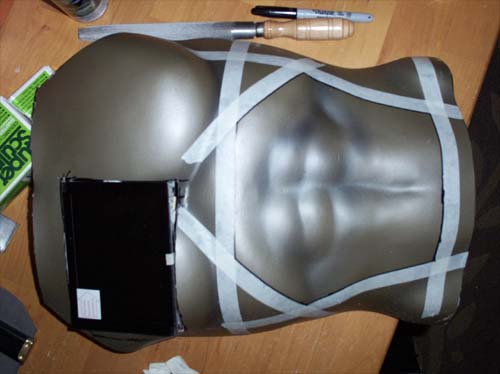
If "supaslicksweet" were a word it would serve to define how well the screen fits, good stuff but time to set it aside because now we need a window...
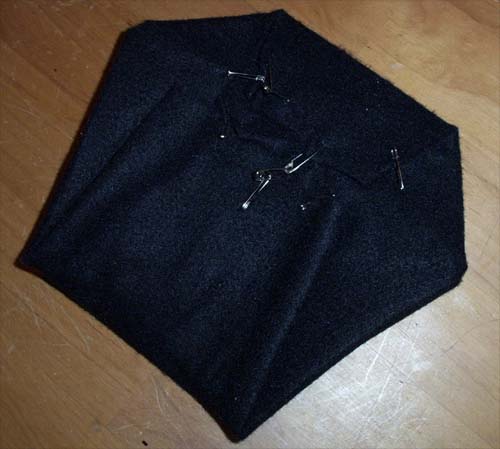
11/24/2004 Starting to take shape... I cut out the abdomen section for the window and covered the cut out piece with felt, I pulled everything tight and held the felt in place with safety pins.
Next I placed my plexi on a baking sheet, I used a disassembled wooden clothes pin under the corners for elevation so I could peek into the oven and tell by the sagging of the sheet if it was pliable.
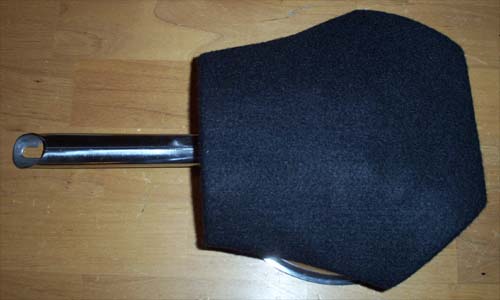
I put the plexi into my electric oven at 275 degrees for 12 minutes, when it looked softened I took it out, and wearing the 'Ove' gloves began quickly forming it around the felt covered abdomen cut out.
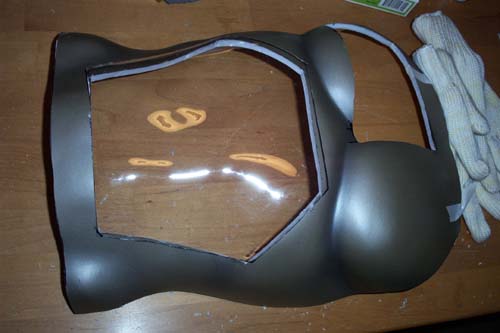
11/24/2004... Abdomen Window You can see the results in the picture below, I think it came out pretty good. After the Plexi cooled I placed the felt covered abdomen cutout inside and traced the edges with a Sharpie marker.
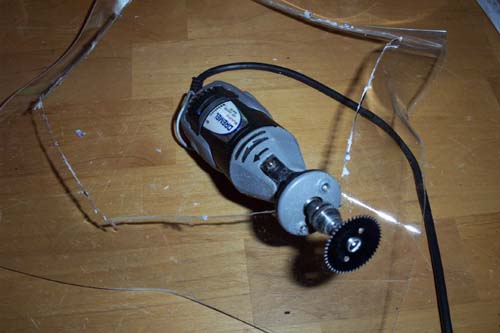
I cut out the curved plexi window using a Dremel with a Gyros brand 1 1/4' ripsaw blade, it has proven to be quite effective for cutting both Plexi-Glass and the Fiberglass mannequin torso.
Here is a test fit of the window, the shape is great but the edges are not as tight as I expected and will require a little more work...
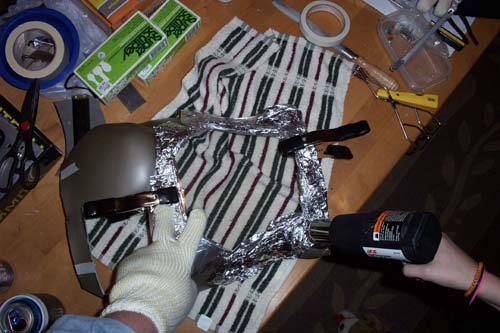
I lined the edges of the window cutout with aluminum foil and then clamped the window in place. I put on the 'Ove' gloves and had my daughter Kellee work the heat gun while I formed the edges of the window, it is a good tight fit now.
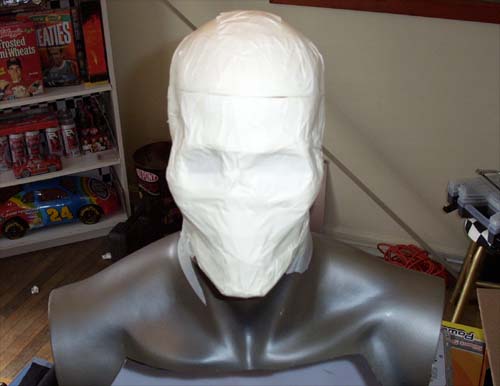
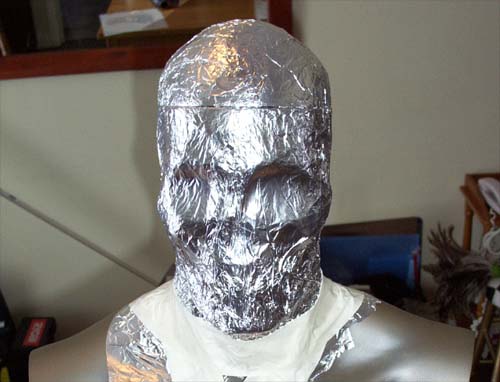
10/26/2004 Update... On To The Head Since I have to wait to install the newly made abdomen window and LCD until I get the cutout for the W/C reservoir in the chest (in fact I still have to order the Fass-O-Matic), I decided to move onto working on the head. First I covered the masking tape wrapped head in aluminum foil, this should make removing the Sculpey a lot easier.
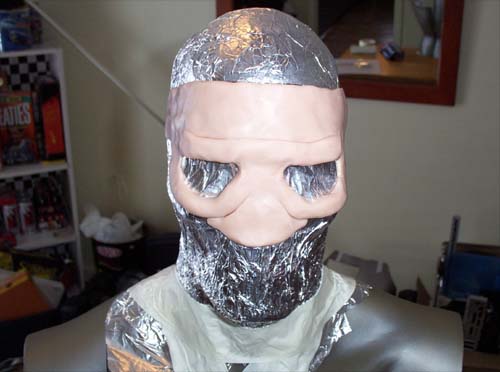
Slingin' the Sculpey, below shows the starting stages of sculpting the Cenobite head, right now I am just looking to fill in the areas.
The picture below shows the continuing process of filling everything in, once I have everything covered I will begin the primary detailing of the head.
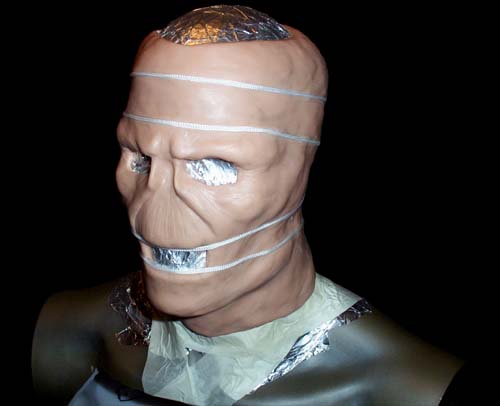
Now that it is all filled in with Sculpey I can begin making it look evil, to this point the only sculpting tools I have used are my fingers and finishing details still need to be added. So that I can make sure everything is in line proper the Glo-Wire will be wrapped around the head as a test fit before baking.
I am still fairly early on in the sculpting, there are still areas that need filling out and the whole thing needs to be smoothed out (finished). I expect to start final detailing tomorrow, then I will show how to fix my mistake of rushing into sculpting... something I figured out after I was halfway finished (dammit!). Oh well, this is a "figure it out as you go" modding process and the hardest part of this mod is now full steam under way.
I added some final details and it looks pretty evil so far, the Super Sculpey has proven to be a very workable sculpting medium, I hope it stays as easy to work with after cooking it.
11/30/2004 Update... Bad Head. Before I go further onto the baking of the head... more parts that I ordered for the mod have arrived, normally I would list them out but you can as easily see what I got below.
Ok, now back to the head. I finished sculpting the top of the head and wrapped some string around it where the Glo-wire will be located. Mouse over the picture below to see the head after the string was removed.
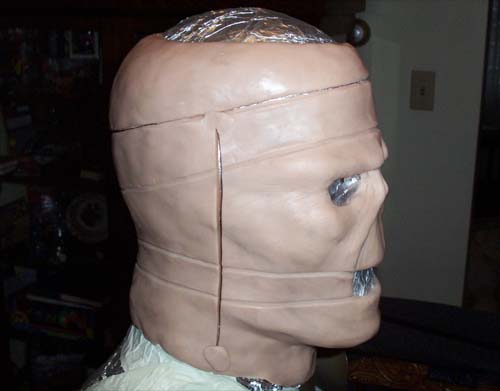
I removed the string and then cut the head down the sides so that it can be baked in three pieces.
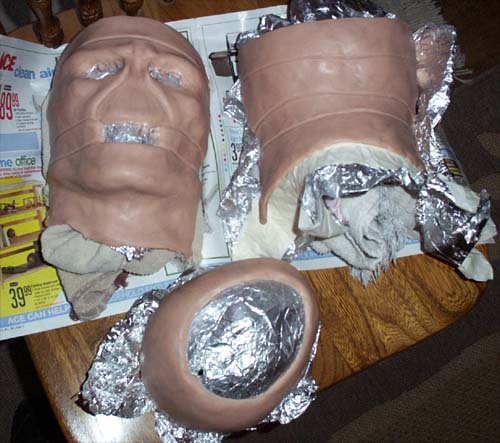
Below are the three head pieces removed, they will require some type of support before baking...
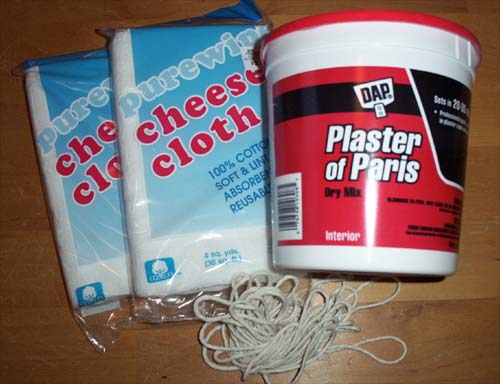
So I bought some cheesecloth and Plaster of Paris...
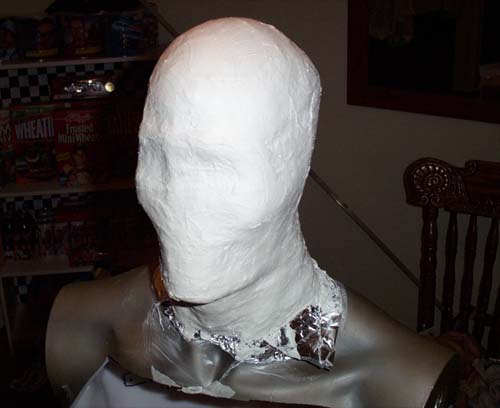
To make a thin cast of the head, when it is dry I will cut it off and reinforce it from the inside with more cheesecloth and plaster.
While it dries I will take final measurements of the eyes and their placement within the sculpted head.
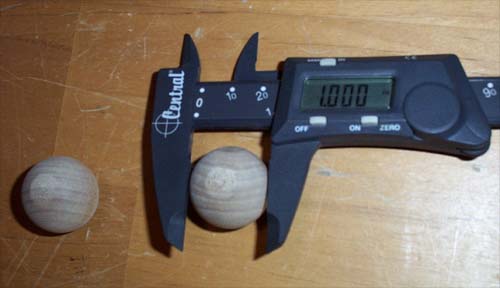
I found some wooden balls that are the same size as the eyes, which I will bake under the face to keep the shape.
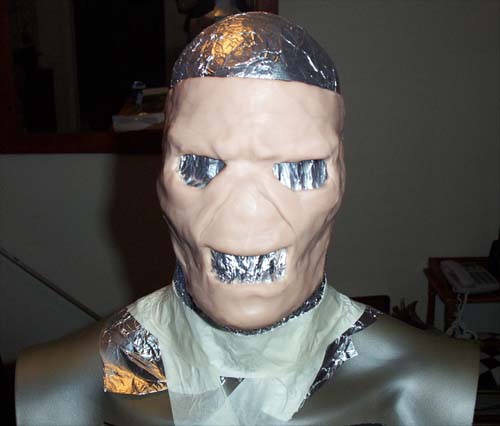
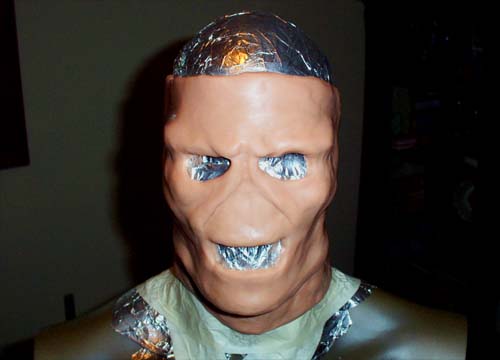
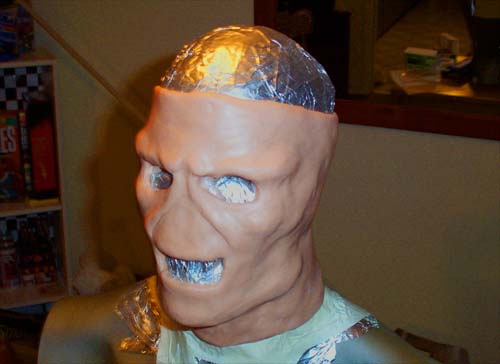
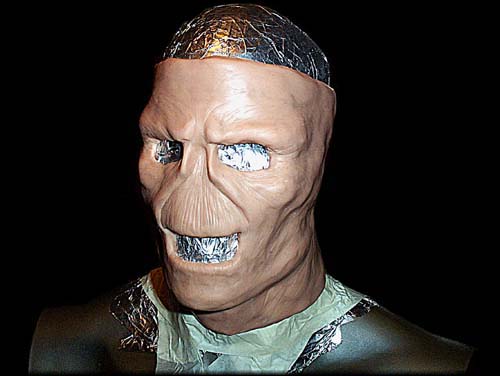
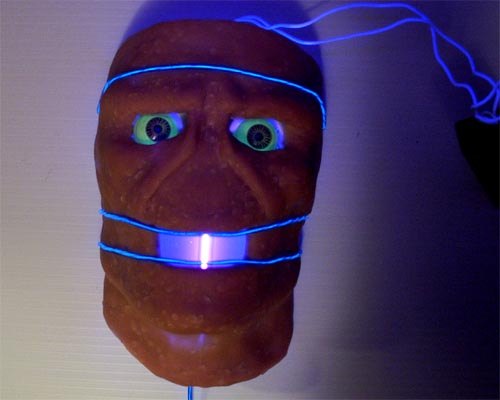
Well, bad news... the head I just made probably will not work. I ordered 5 lbs. of Magic Sculp (Milliput type stuff) and will start over when it arrives. Just for grins, and to see where it's at if I recycle the face, I put the eyes in and threw on the Glo wire.
It looks ok, a coat of paint would definitely help... but I think that I can do better. 5 lbs. of Magic Sculp will be here in two days so I will likely take a mulligan on the first shot and go for something scarier. |
|
|