|
Projects | Guides | Gallery | Articles | Contact |

|
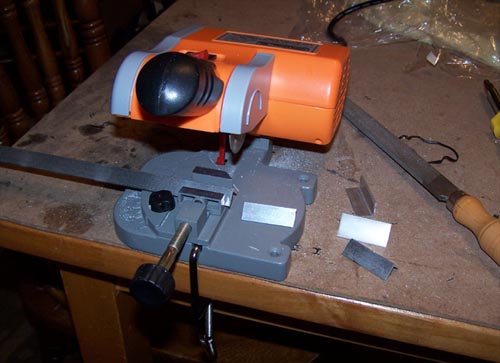
Work Log Page: [1] - [2] - [3] - [4] - [5] - [6] I bought a small chop saw from Harbor Freight for $23.99, for cutting small stuff like Alum-angle it works better than a Dremel or nibbler... the only downside is cutting too fast causes the saw blade to bind up, but after finding the sweet spot - speed wise - it cuts Alum-angle fairly accurately.
The pieces of Alum-angle are being cut to make everything match up, they are going to be attached to some acrylic cubes I had lying around - after I JB everything together I plan to attach them to the bottom of the PC.
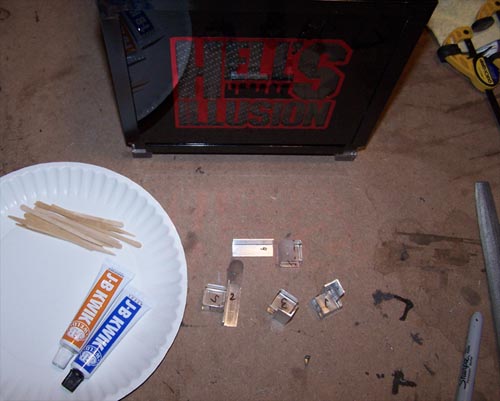
So... below shows the JB-Kwik, paper plate, some craft sticks and the numbered pieces of acrylic and Alum-angle ready to fly.
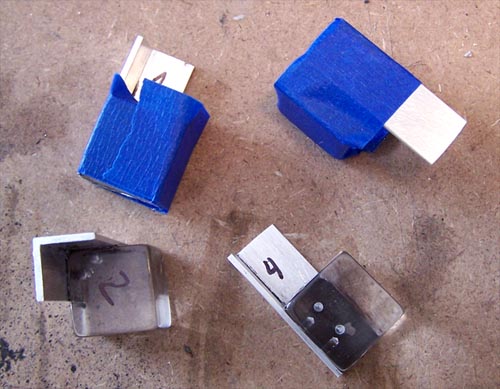
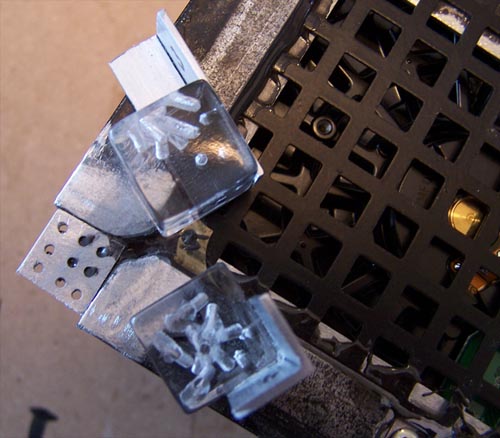
Since JB-Kwik doesn't work so great on completely smooth surfaces I decided to give the corners a little extra strength by drilling a couple of shallow holes in each side for it to flow into on top of filing them rough. The overflow JB was scraped off and all the pieces were taped together, below shows them finished.
I cut four small squares of Alum-angle, drilled holes into them and filed them rough, they were then carefully JB-Kwik'd into the corners. I also drilled some holes into the top of each acrylic cube to give the JB somewhere to flow and hopefully strengthen the connection.
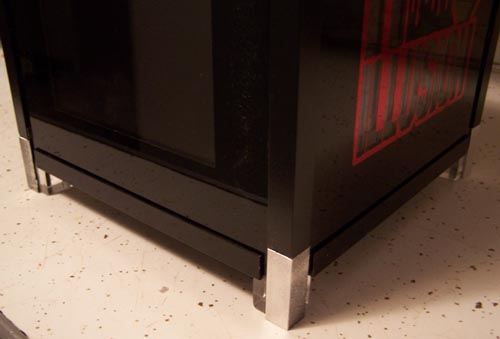
The feet stuck on really well so I cut four half inch pieces from a length of 3/4x3/4" Alum-angle to hide the gaps at the bottom and JB-Kwik'd them into place. The whole thing was masked and then painted, results below.
Here is the other side... just a little more work to do and it will finally be done, detail work and fixing the things that bother me.
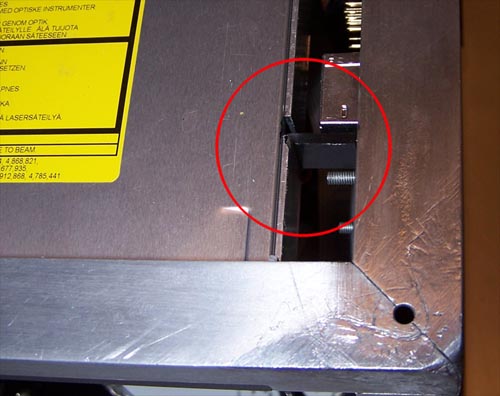
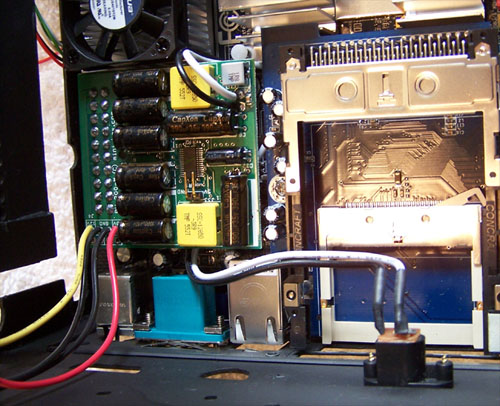
One of the things bothering me is the fact that the plug for the internal USB connection from the Matrix Orbital stuck out too far to be usable and as a result I almost cheesed out and connected it externally... but I am a modder and having wires sticking out all over the place couldn't possibly be the best option. I came to my senses, figured out a better way and cut out the side of the CD bracket to accommodate the M.O. internal USB plug (below, circled in red), this will also free up an external USB port which is important since there are only two.
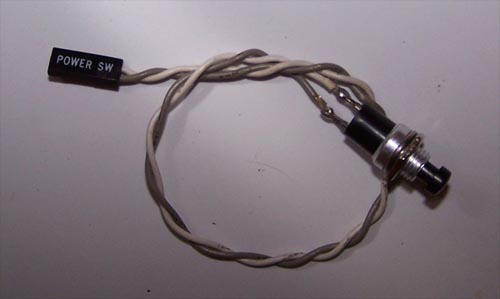
Since the design for the outer acrylic housing was changed to slide off in one slick piece I had to wire up a new power button which will now be hidden beneath the mod... which is better anyway.
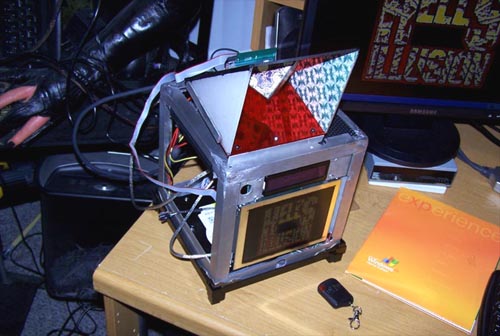
I roughly assembled all the parts of the mod (except for the outer acrylic casing), plugged the Matrix orbital into the internal mother board USB pin-out, plugged the illusion section LED's into the back of the Matrix Orbital and attached the new power button onto the bottom side of the mod. The following picture shows the mod up and running, but I mentioned some things bother me and having the chassis look like glued together prototyped aluminum angle is a big one, time to take all the hardware out and paint this bad boy matte black.
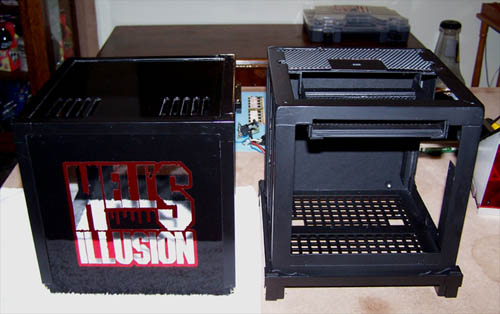
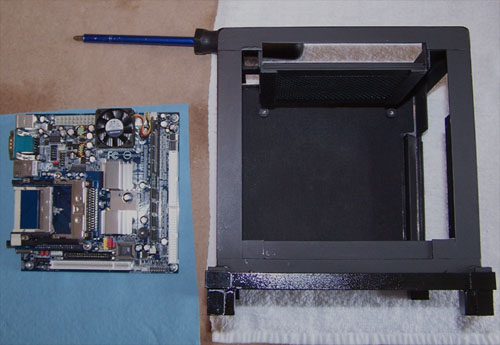
I masked everything off and sprayed down a few coats of matte black and it looks so much better, the following picture shows the freshly painted frame sitting next to the outer casing.
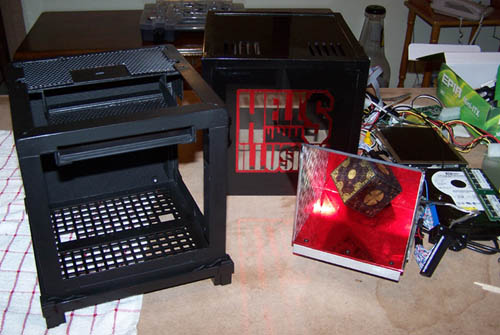
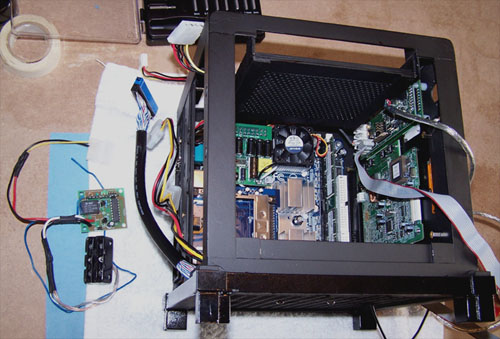
And next is the painted frame sitting next to all the parts that need to be re-installed, which reminds me that I never clearly showed the assembly of the components. Everything goes in and comes out quite easily... removing some parts require removing others first but so long as it is done in the proper order it works pretty well and I am happy with the design.
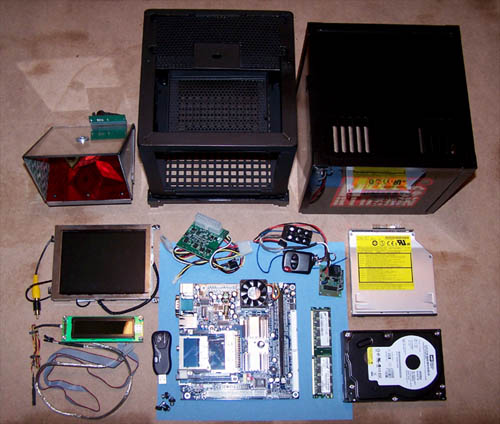
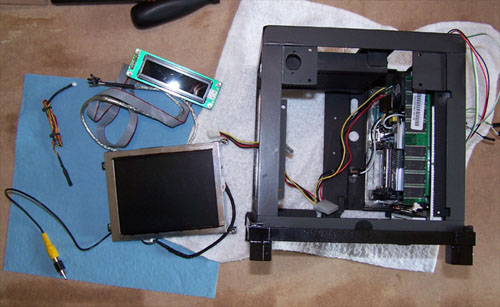
The parts are ready to be re-installed, but first up a picture showing everything I am going to hide in the eight inch cube.
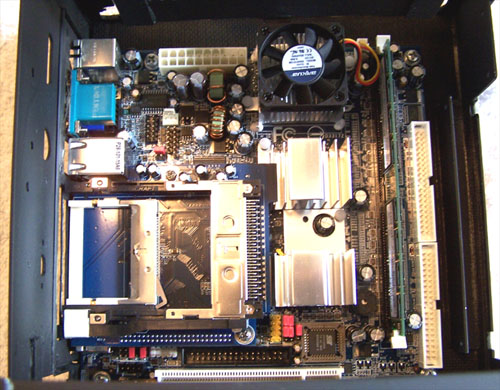
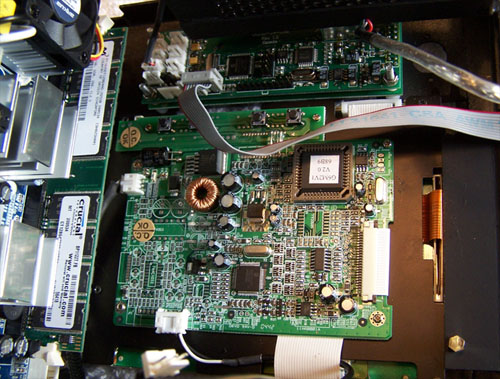
First to go in is the VIA Epia-MII 12000 mother board...
Four screws later...
Next to go in is the Ituner PW 200M power supply...
And the PSU installed onto the mother board and the plug end into the side of the frame.
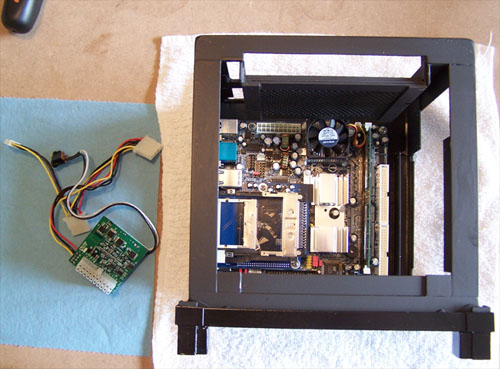
Next to go in are the LED's that are hooked to the mother board as power, hard drive activity and suspend lights, they also shine down behind the Hell's Illusion decal.
On to the 6" LCD and Matrix Orbital MX222 displays...
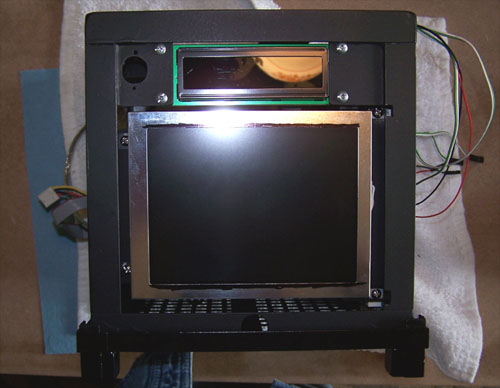
It is easiest to put in the MX display first and then the 6" screen, below shows them both installed.
And a view of the backs of the screens from the inside...
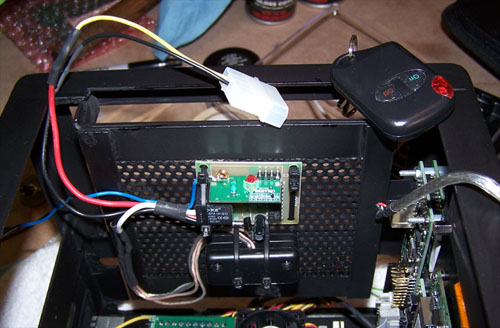
Below shows the 12v remote sensor and two sets of red Lazer LED's that have been modded onto it...
And the remote control lighting installed...
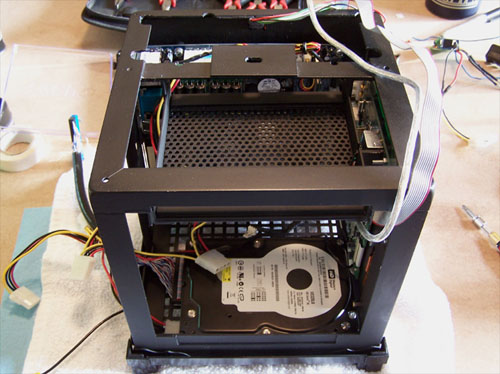
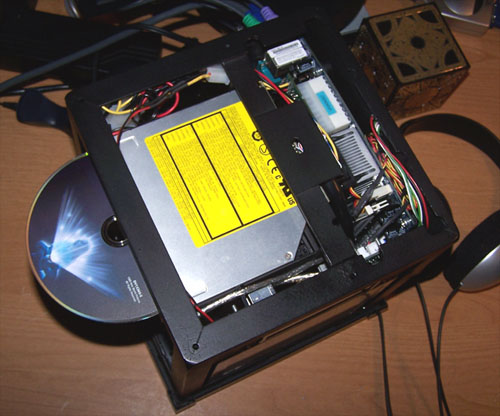
The next piece of the puzzle is the 320GB hard drive...
Followed by installing the slim line slot load DVD burner, now all that is left is put the external casing on and give her some juice.
The next picture is a close up of the 6" LCD, which functions quite well at 640x480 resolution as a secondary yet independent monitor.
And another test fire of the remote lighting...
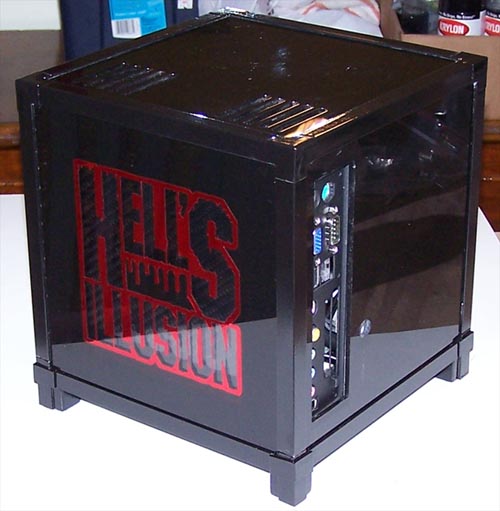
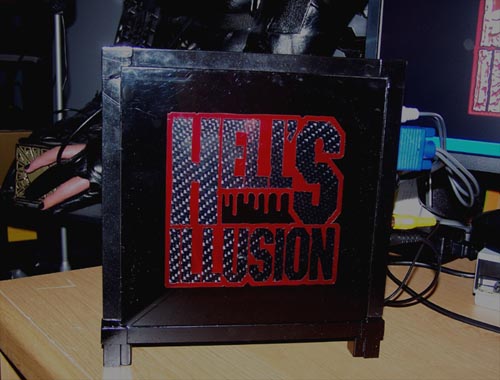
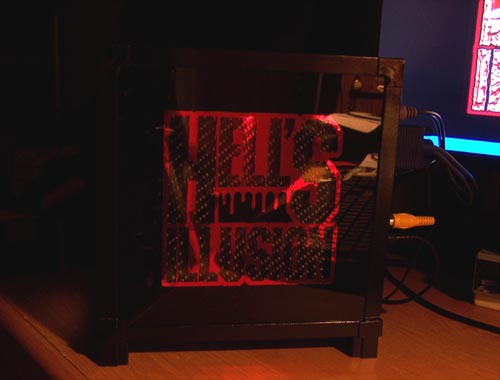
The next picture shows the carbon fiber (which is the back side of the mother board tray) beneath the vinyl "Hell's Illusion" decal and back painted acrylic panel in full light with the camera flash on...
And a dark shot of the vinyl decal, you can make out the red LED's reflecting off the carbon fiber up top in the letter "L"... it's not quite as cool an effect as I had hoped, but it is acceptable. I will probably end up making the thin space at the bottom between the acrylic and the mod reflective to direct the lights back up onto the carbon fiber.
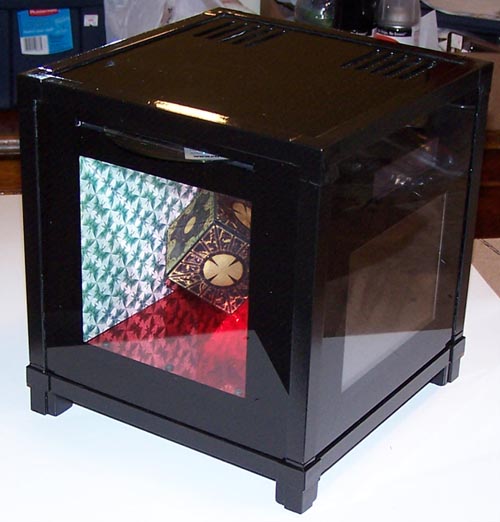
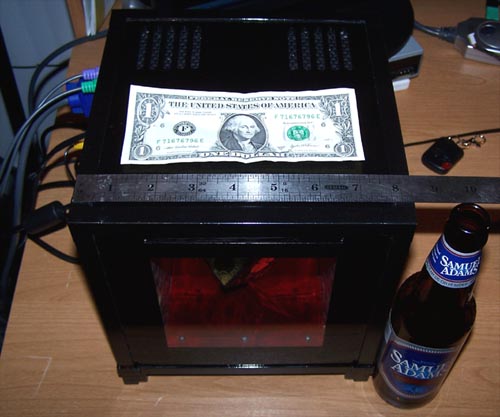
Size comparison time... the mod is an 8 1/4" cube, a dollar bill and ruler are sitting on top with an empty (tasty) 12 oz. bottled beer beside it (which the mod stands just a hair shorter than) shown below. I was careful to keep the goings on of the side panels all relative in size and as you look over the following pictures you can see that the illusion panel is the same size edge to edge as the LCD/M.O. panel and Hell's Illusion decal panel, it's all in the details.
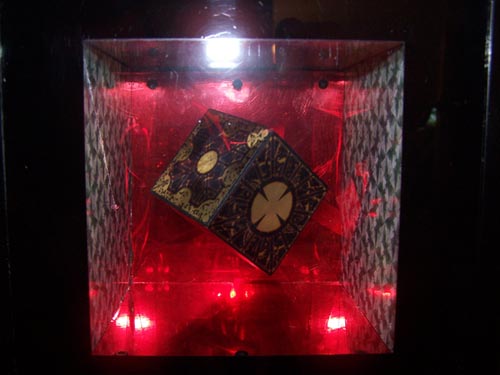
Due to the seemingly simplistic nature of this mod the details are easy to overlook, like the fact that the side walls of the illusion are illustrated using a repeating pattern of Escher angels and devils or that the edges of the side pattern and the half HellRaiser box line up so tightly with the mirror... the reflection of multiple boxes onto the red mirror chrome within the illusion section is also pretty neat and is also shown in the picture below.
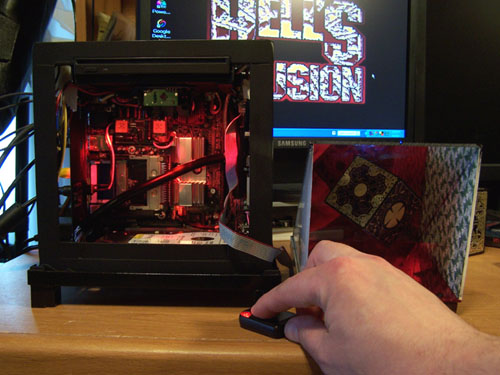
I haven't had enough time to mess with the Matrix Orbital to make more than the one LED in the illusion section light up, but I will... in the meantime I turned the single LED off and used the remote control to turn on the internal red LED's. The following picture shows what it looks like with the red lazer LED's on in ambient lighting with full flash, it's semi-transparent and kind of funky...
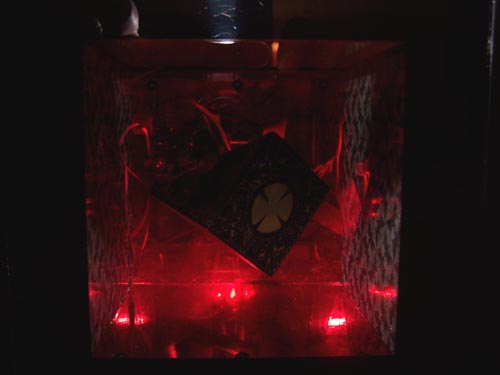
The following picture was taken with the lights out and camera flash muffled, after pushing the wireless remote button the secret of the illusion section is completely exposed showing both parts and cables lit up behind the half cube. I had planned on changing the internal lighting over to white, but red is where it's at... the red LED lighting blends into the red mirror chrome and makes the internal PC parts look almost surreal.
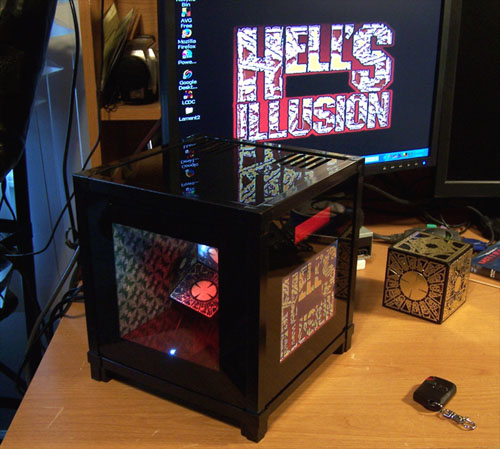
And here is the mod fired up and purring away on my desk. For something so simple looking this mod was at times a great pain in the ass, fabricating the small case was trial and error and it went through several design revisions before I got it right. It took over a year in my spare time to complete the build, but it's small and impressive, the parts are all easy to access and it is fully upgradeable... so it's all good.
The whole case is made out of Alum-angle and back painted acrylic that's completely held together with JB-Kwik, the design is such that the theme could very easily be changed... so if I tire of HellRaiser I can always make a different illusion section and outer casing for it.
SYSTEM HARDWARE:
VIA Epia MII12000 Mini ITX Mainboard iTuner PW200M 200W Power Supply Crucial 1GB DDR266 CL 2.5 Memory Western Digital 320GB 7200RPM Hard Drive Panasonic Slim Line Slot DVD/RW Drive Matrix Orbital MX222 2x16 VFD Display Parts Express 6" TFT LCD Monitor Logisys 12v Remote & Red Lazer LED Stay Tuned... I Have Such Sights To Show You. - Work log by ARTbyTROY |
|
Disclaimer: This how-to guide is presented for informative purposes only. CaseModGod.com can not and will not be held responsible for damages to or resulting from anything that you may decide to do to your case or hardware. We also can not and will not be held responsible for injury to your self or others as a result of attempting any of the things that are shown on this site. Basically you are responsible for your own actions whether said actions were based on information garnered from this site or elsewhere, learn to deal with it. |