I put the whole thing
together, in the following picture you can see the flat head screws I used
to hold the top on... they work, but I freaking hate them. I've decided that
after I fire up the system and know for sure that it works I'll be riveting
the top down, if I ever have to remove it then I'll simply drill out those rivets,
whatever. Hardware
goes in, hardware comes out... time to completely disassemble this thing and
remedy stuff n' what's been bugging me.
One of the things bothering me was that
as it were the hard drive would
require the drilling of rivets to replace or remove it... in the picture below you can see
how I fixed that. I also cut and filed the Alum Angle to better fit the adapter
for the S-video, nibbled out the bottom side Alum Angle to better
fit the 6" LCD and also smartly changed out the four side rivets that mount
the LCD to the case for the above mentioned (now somewhat less hated) screws.
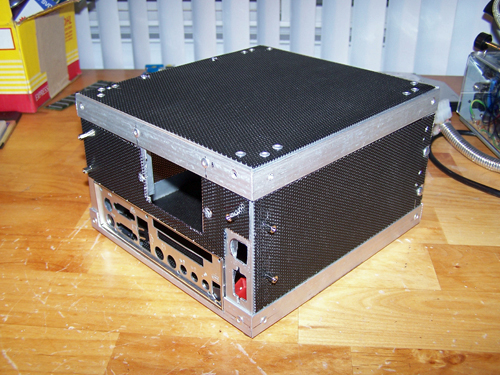
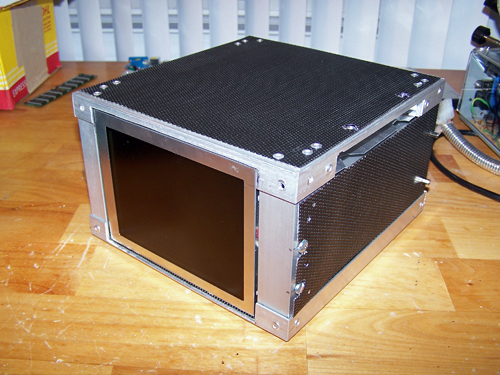
I cut up some more MeshX for
the sides and back of the case, the mesh is just mock fit for now and will be
among the very last things to be installed. I am using the mesh for
cooling (30%) and also for effect (70%), so when I'm done it should be (100%)
cool.
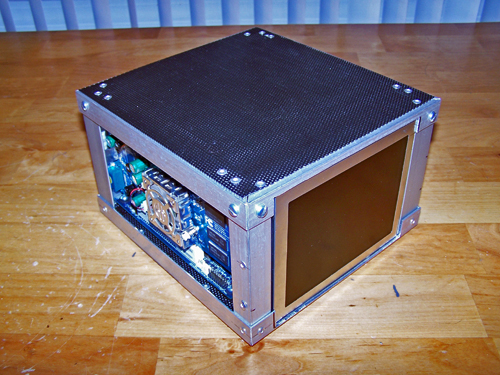
Below shows the CD and LCD
sides of the mod, the mesh panel on the CD side is there purely for looks and
will be a big part of the only lighting feature within the mod... more on that
later. Time to remove the LCD and do some more touch up drilling,
nibbling and filing to the case, not long now and I'll be able to start on the
outside section.
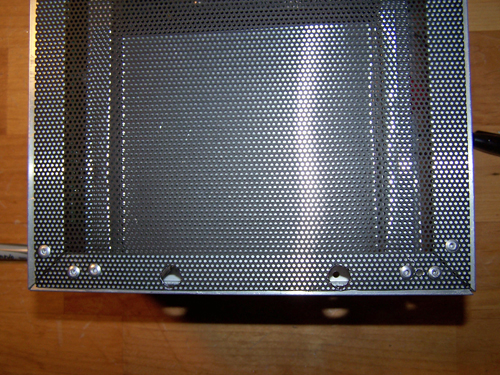
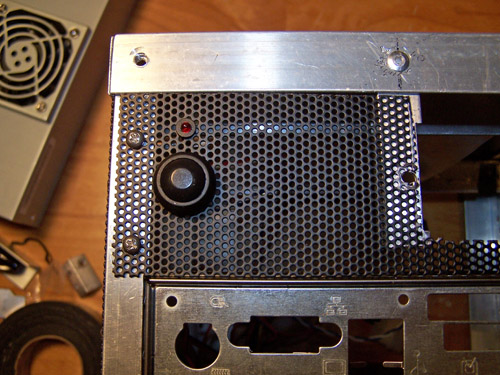
OK, I drilled the hole for
the power button and HDD activity LED, you can't see it in the picture below
but I also nibbled out some mesh on the other side to fit the cable from the
LCD.
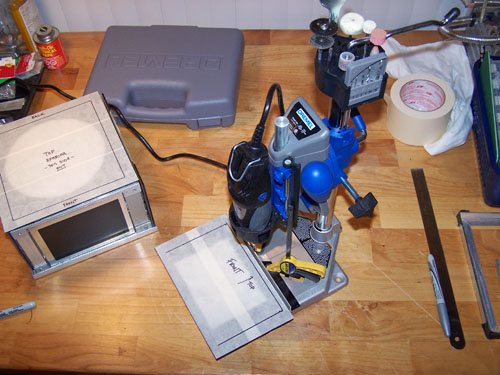
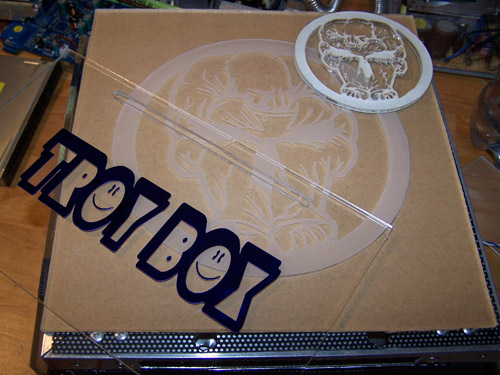
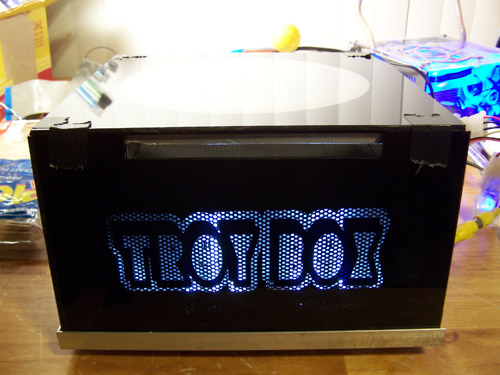
The following image is an
edited render of how I hope the final cut vinyl for the CD side will look, the
areas inside the letters will be masked off so the illuminated mesh can shine through.
Time to contact my vinyl guy and see
if he can help me out.

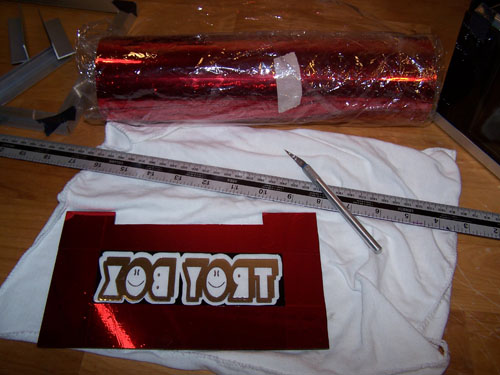
Below shows my lighting
idea, it looks way better live. I made the call and I should be able to
pick up my blue mirror chrome sticker by tomorrow and then I will begin
creating the acrylic outer sections.

10/30/08
Update...
I had a half used sheet of
AC Ryan Acryl panel kicking around that I covered on both sides with clear
contact paper, I measured my side markings onto it, scored it a few times
with a plasti-cutter knife and snapped it off.
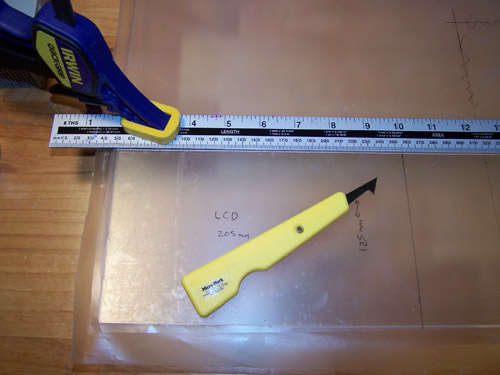
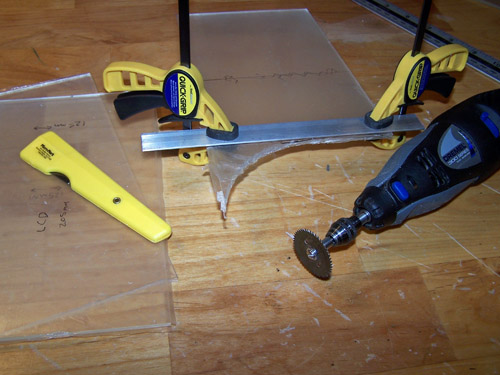
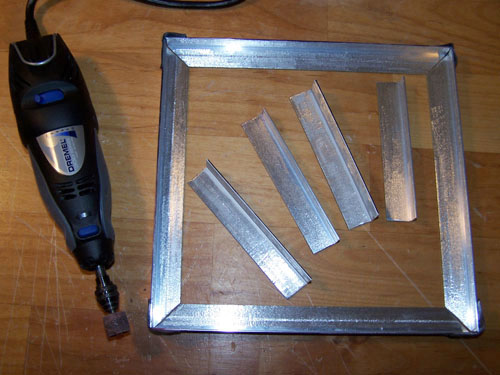
The plasti-cutter knife
works great for straight line cuts, but won't work for cutting the edge off the
piece of acrylic that's shown below. Enter the Dremel with a ripsaw
blade, I clamped a piece of Alum Angle to the acrylic as a guide for a nice
clean cut edge.
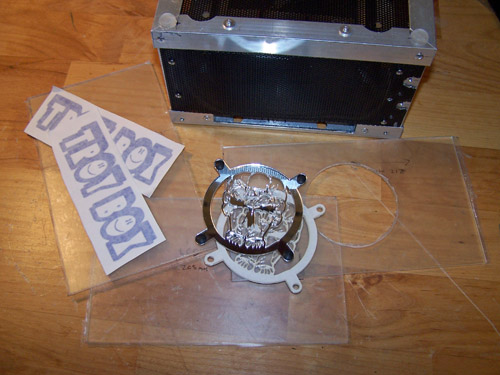
The following picture shows
all of the side acrylic pieces cut to size. I drilled an 80mm vent hole
in the video card side acrylic panel, the 'gluttony' mirror fan grills are
shown on top and my two freshly cut blue mirror chrome vinyl decals can be
seen to the left... not far now.
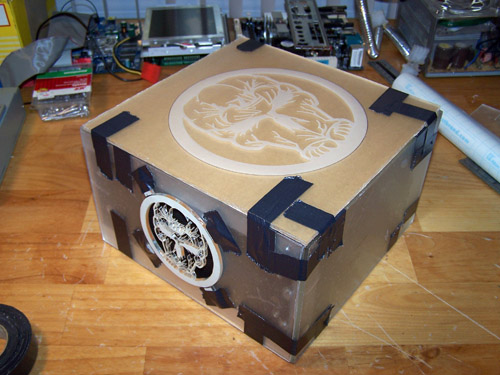
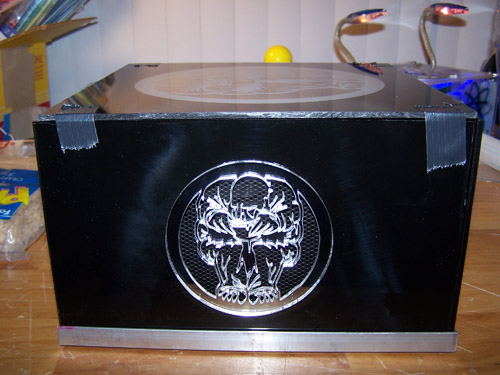
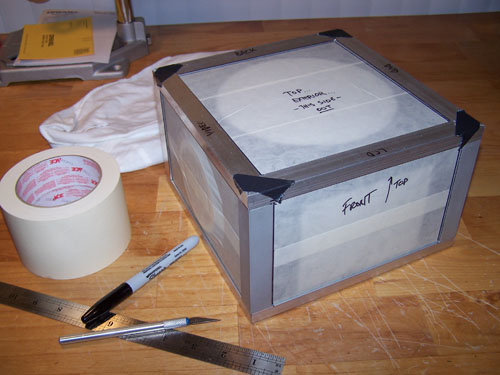
I masked off, measured and
cut the laser etched top acrylic panel and then duct taped the whole thing
together, mainly just to get a better look at where I'm at. I wanted to
do more today with it, but lost motivation to Guitar Hero and watching TV
instead... maybe I'll get more done on it tomorrow.
11/12/08
Update...
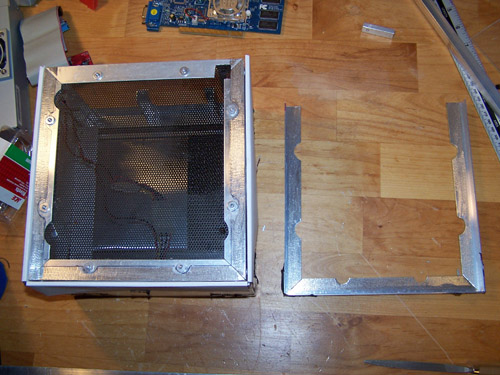
Below shows
the case bottom, next to it is the taped together bottom edging that will hold
the three acrylic side panels in place. I used a Dremel with a coarse
sanding drum to rough up the bottom edges of the case and also inside the
bottom edging, I then cleaned all the parts with some alcohol and a paper
towel.
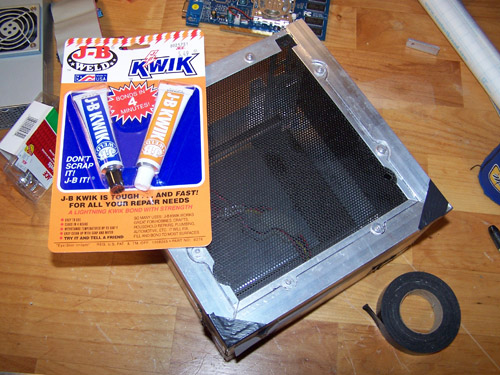
Once everything was clean
and dry I whipped up some J-B Kwik and attached the bottom Alum Angle
edging. The J-B Kwik will need a few hours to fully cure so it's on to
some acrylic work.
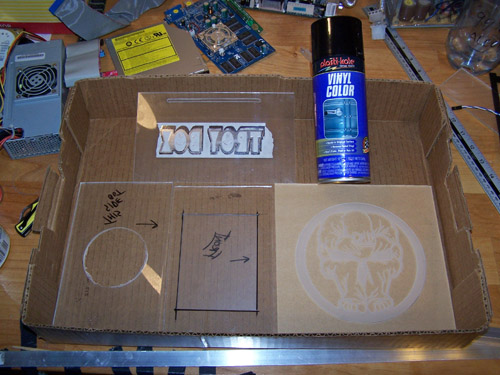
The first thing I did was
cut the slot for the CD, I used my Dremel and ripsaw blade with a piece of
clamped alum angle for a guide, then finished tooling the slot with a Zona saw
and a pair of files. I also cut the mounting tabs off of the gluttony
fan grill, installed the TroyBoX vinyl and cut masks for my lettering, the
6" LCD and the top glutton etch.
It's cold outside,
definitely not optimal spraying conditions but I know a work around - I call
it the in and out speed spraying technique and it only works when the wife
isn't home. Notice that all the pieces to be back painted are setting
inside a box...
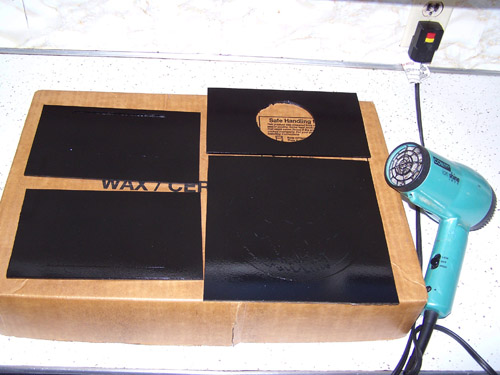
The box is taken outside for
a quick spraying of Vinyl color and then comes back inside for some speed
drying, this is repeated as needed. It stinks to high hell and my wife
and kids hate it, to try and keep the stink down I use the inside of the box
for painting and the outside of the box for drying.
I removed the masking from
the panels and found that I had only hit for 50%, the top and blowhole side
panels came out great, but I'm calling mulligan and scrapping the LCD and 'TroyBoX'
side panels. I was almost going to show them here because they are still
useable, but I'll wait until all four sides are perfect instead.
11/16/08
Update...
Ok, all
four panels are finished and even though I still have to clean and polish them
they are now fit to be shown. Below is the video card side opening with
the mirrored Glutton grill over mesh accent.
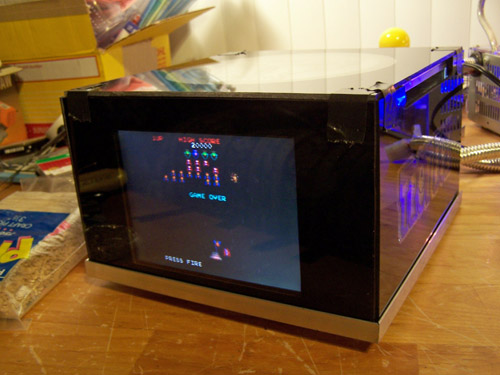
Here is one of the finished
re-do panels, I hooked up a handheld video game to the 6" LCD to check
how well it lines up and it's spot on, I guess second times the charm.
The next picture shows the
other reworked side panel, it came out way nicer than the one it replaced and
even better than I expected.
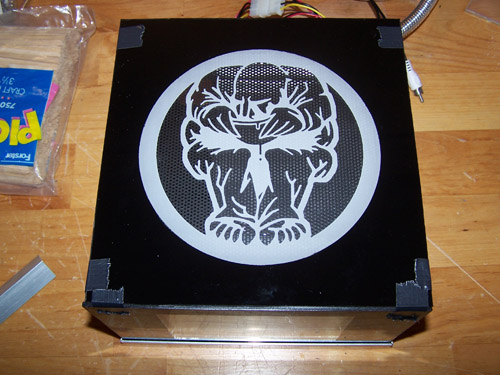
Last but not least, the back
painted Glutton etched top panel... not far now.
12/07/08
Update...
I cut all
the external Alum-Angle pieces using a hand saw and miter box (mainly just to
see how it would go), as expected the adjoining edges are rough and ill
fitting... even after filing they still need some serious help. Since
they are still salvageable I'll get my table sander out of the tool shed and set about making things right.

01/02/09
Update...
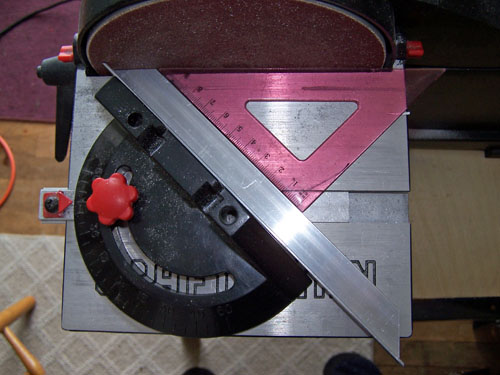
I'm
uncertain as to how much cat I can let out of the bag, but a big name magazine
wants to feature my work... the "TroyBoX" project now has a January
12 deadline - time to put the pedal to the metal. Below is a shot of the disc
sander and one of the Alum Angle top edges, the sander made short work of
truing up the edges and everything fits great now.
The TroyBoX
side panel had a problem with the light bleeding through where it was
brightest - mostly down low near the LED's. I busted out some red mirror
chrome vinyl and fixed it, no light will be seeping through now.
I masked off all of my
panels and loose fit all of the Alum Angle pieces together, I then traced
the edges onto the masking tape in marker.
I used a coarse sanding drum
on the Dremel and hit the inside edges of the Alum Angle, they got roughed up
pretty good.
I hope every good modder got a
Dremel Workstation for X-mas... below shows an acrylic panel that's fixing to
get a bunch of holes drilled in it using my 2nd favorite gift this year (1st
fave - wii GHWT), all of the panels will be drilled along their edges in
preparation for JB Weld.