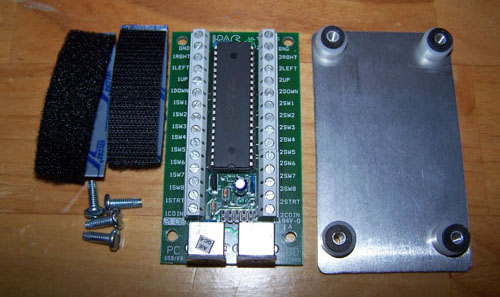
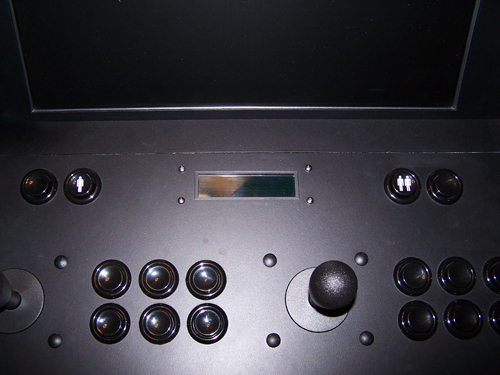
I had to figure out a
way to mount the Ipac2 controller to the bottom of the arcade controls
panel, below shows what I came up with. I made a board tray out of
some scrap aluminum, drilled four holes and implemented the same spacers
and board mounting technique that I've used on my last four projects,
the whole thing will be attached with Velcro.
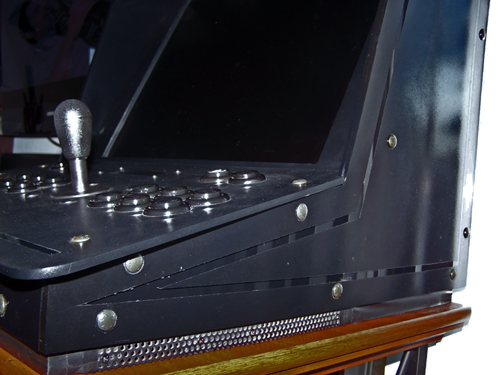
The micro switches on
the joysticks and bottoms of each button have three contact points - a
normally closed position, normally open position and a ground. I
used the normally open contact and wired each micro switch to its
corresponding location on the Ipac2 board.
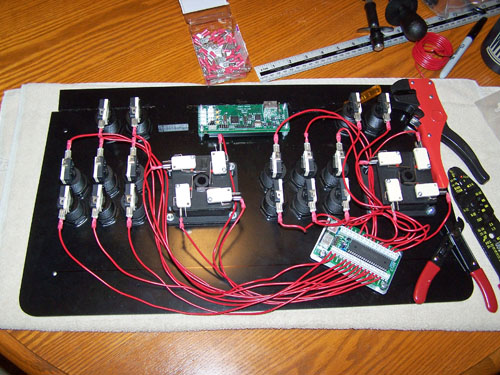
Next I piggy backed
the ground wire to all of the switches for each player side and wired
them to the ground point on the Ipac2 controller board. While I
was at it I tidied it all up and then ran the USB cables to the Ipac2
and Matrix Orbital display.

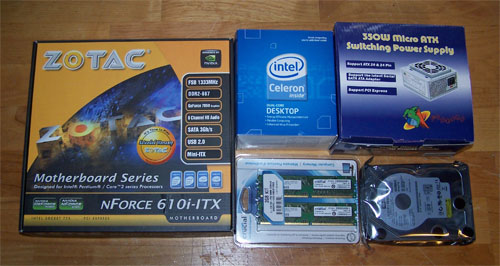
I have a bad habit of
not ever letting good enough be good enough, the hardware I had would
have worked fine but I decided to beef up and change everything
out. Below shows the upgrade - a Zotac mini-ITX motherboard with
GeForce 7050, a Celeron 2.0 GHz dual core processor, 2GB of Crucial DDR2
667 memory, a 350W micro-ATX power supply and lastly a 320GB Western
Digital hard drive.
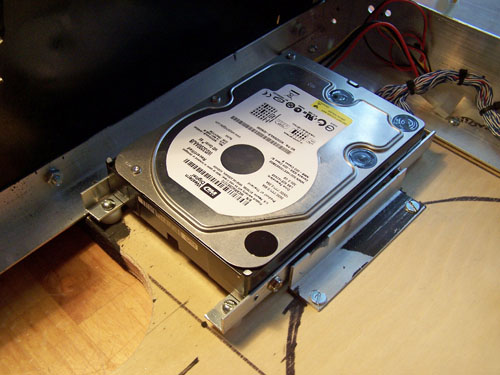
Since I am no longer
using the IDE adapted 16GB compact flash in this project I had to come
up with a mounting method for the larger hard drive. Good old
aluminum angle and plastic spacers to the rescue, below shows what I
came up with, it's a perfect fit.
I also had to come up
with a way to mount the larger power supply in a different location,
again I used aluminum angle that was cut, filed and drilled to fit...
alum-angle is awesome.
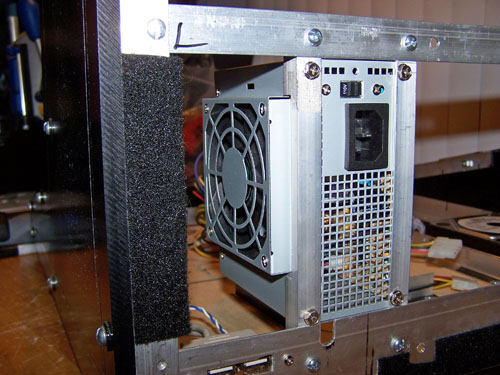
Mounting the new power
supply meant having to relocate the mother board, I drilled four new
holes and problem solved. With all the hardware installed it's
time to fire it up and install WindowsXP, drivers, updates and MAME32.
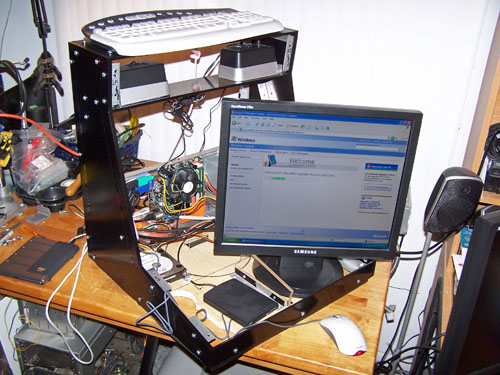
After the operating
system and programs were installed it was time to throw it together for
a test run. Below shows my 10 year old buddy BJ tearing up some
R-type, after playing around twenty or so other games I asked him what
he thought and he told me "Every kid should have one of
these."... true that.
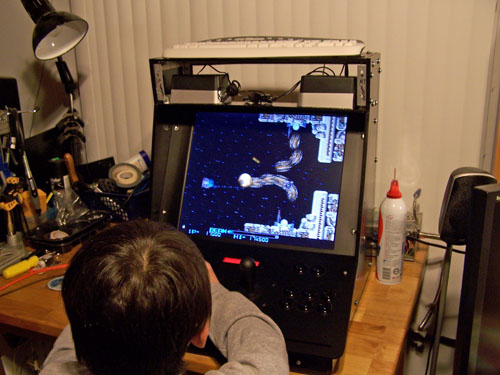
Hands on
testing of my own revealed a major design flaw that needed to be
addressed, the plexi sheet that the speakers rest on sits flat
horizontally (see
above picture) so it is hard for an adult to view the upper most parts
of the screen while standing and playing. Changing the angle (see
below) fixes the problem and also the speaker output is better directed forward instead of straight down.
To plug (hide) the four bolt
holes that opened up when the angle of the speaker panel changed I
used
some black plastic auto panel fasteners that I got from my local hardware store.
I had to cut back the
pointy end of the auto panel fasteners so that they would sit flush on
the inside of the acrylic panel, they do a pretty nice hole plugging
job.
Changing up the angle also means the
$23.90 marquee from MAMEMarquees.com
is now the wrong size and will not work.
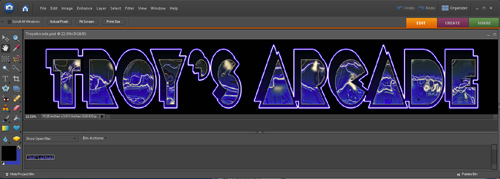
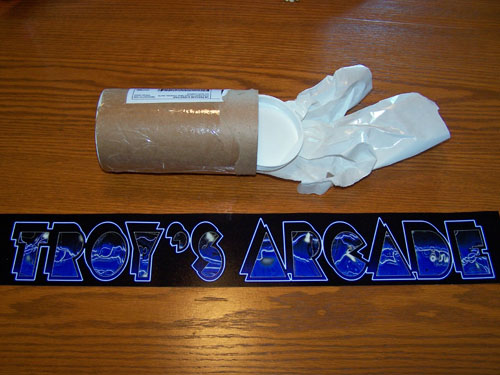
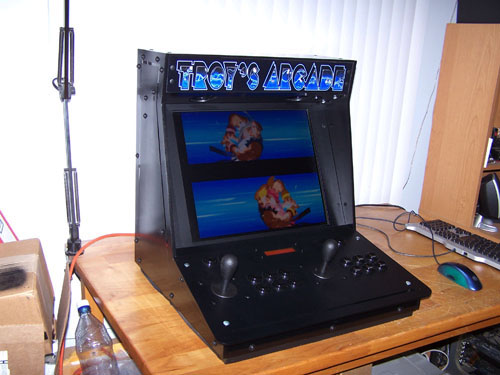
The arcade needed a new
marquee and it only took a couple attempts
before I came up with something I liked even better than the last one. Once my design was
double checked and finalized I uploaded it to GameOnGrafix.com.
The new and improved
marquee cost $19.35 shipped, it arrived in three days and it looks
absolutely fantastic straight out of the tube.
Below shows the
marquee LED strip lighting and the white acrylic reflector panel which
is held in place by small pieces of Velcro attached to the speakers.
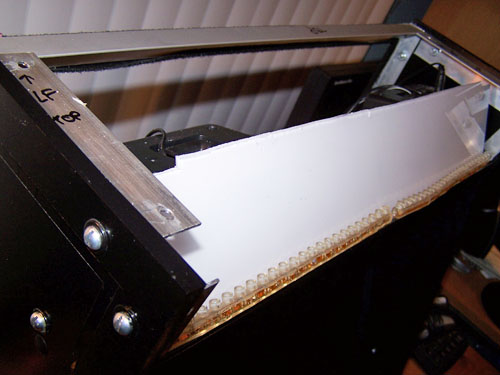
I cut two pieces of
acrylic to size and sandwiched the printed marquee graphic between them
and bolted it all down. An on/off switch was attached to the power
for the marquee lighting, mouse over the image below to light up the
marquee.
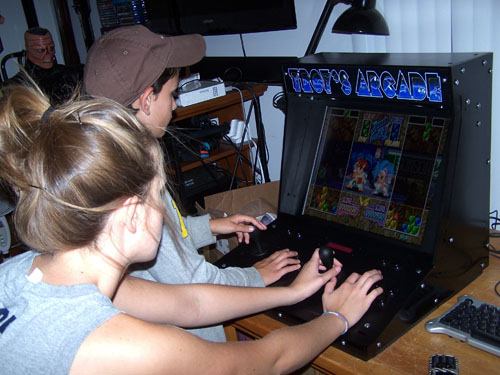
Time for a little two
player hands on testing, which calls for multiple games of Super Puzzle
Fighter 2 Turbo followed by a few rounds of Capcom Vs. Marvel. The
result - two out of two kids agree that my arcade machine rocks.
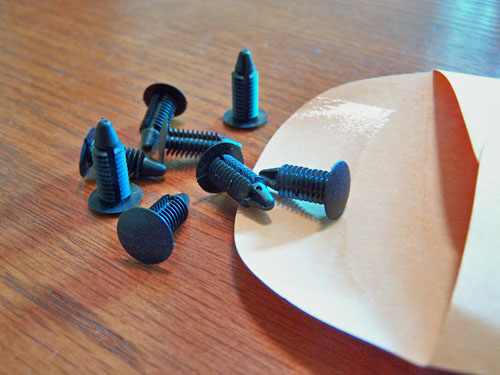
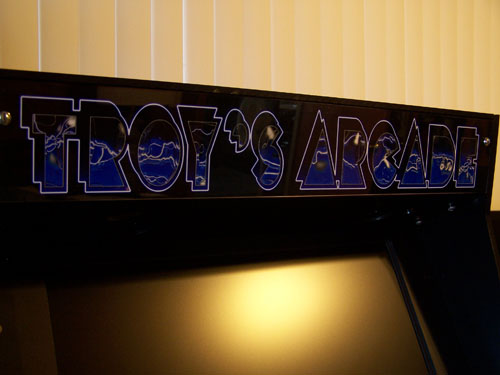
After looking more
closely at the freshly installed marquee I decided that the shiny bolts
looked rather half-assed. Changing over to auto panel fasteners
required making new side attachment pieces and drilling a couple more
holes in the marquee, but the end result was totally worth it.
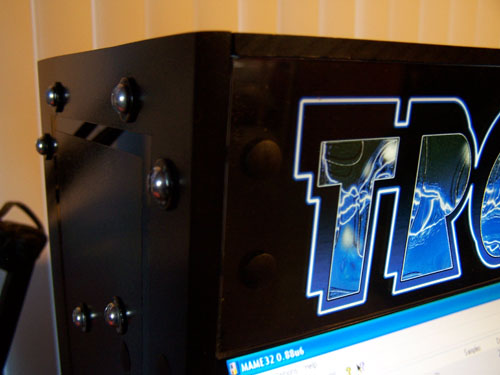
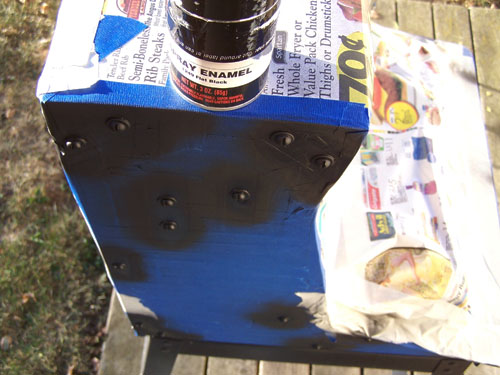
The silver bolts
sticking out all over the sides looked out of place, so I masked off the
entire thing and spray painted them all flat black.
I had originally
planned on putting side panel artwork onto my arcade, but I like the
clean look of it without side art better... for now anyway. My
MAME project is officially finished, everyone that has played it agrees
that it is one of my coolest builds to date.
There were a few
things about my arcade that bothered me, firstly there were three power
cords coming out of it. The 6" black extension cord in the picture
below is half of how I solved that. The second thing that bugged
me were all the flat slot bolt heads holding it together, they will all
be replaced with black oxide carriage bolts. Lastly, I found black
one and two player buttons to replace the buttons that are currently
there.
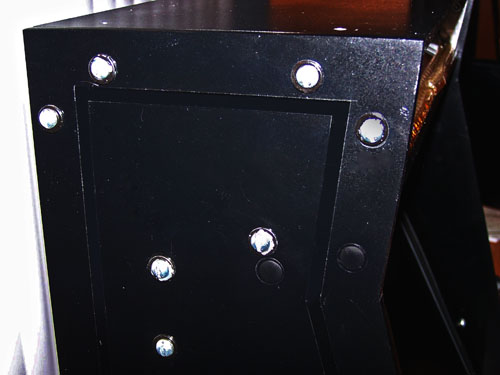
One by one I removed
the flat head bolts and washers and replaced them with the carriage
bolts, no small chore. The reflection of camera flash off the
carriage bolts doesn't give a true look at how well they blend with the
black acrylic, in reality they are perfect and make the build look
really professional.
I mentioned above that
the 6" black extension cord was half of how I turned three power cords
into one, the other half is shown below... It is a five grounded outlet
surge suppressor and with all three cords connected it just barely fit
inside.

I didn't want to have
to reposition the power supply just to hide the power cable to it so I
re-route it back into the case. The on/off switch in the picture
controls the marquee lighting, below it are two USB 2.0 ports and below
those is the power button.
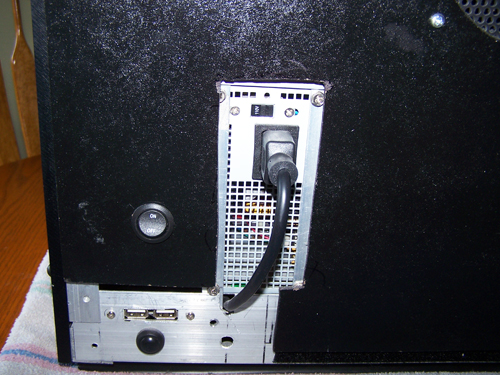
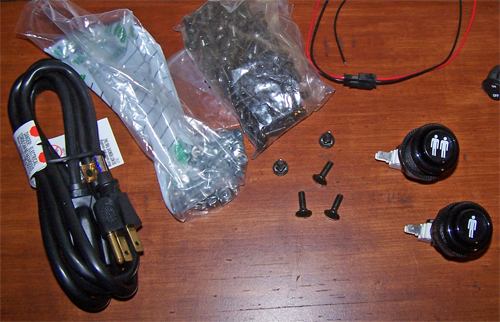
Last but not least the
player one and player two push buttons... they really set the whole
thing right. The two black push buttons that were removed will be
repurposed into my new arcade project
that is currently underway.
Stay Tuned...
Page
1 - Page 2 - Page
3 - Page 4 - Page
5
