The foam board illusion section mock up worked well,
now it's time to lay out measurements onto the two-way and
first-surface mirrors and prep them for cutting.
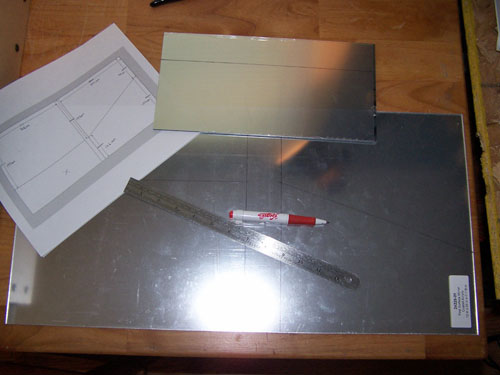
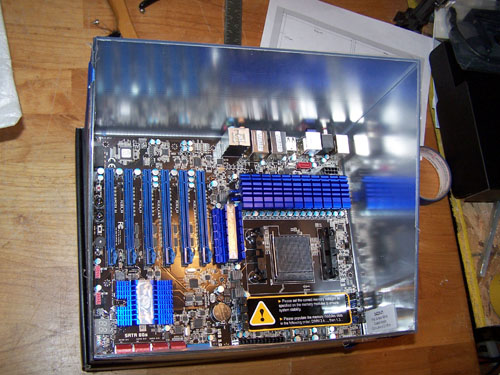
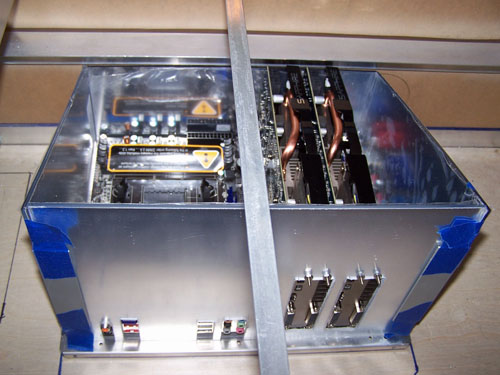
I scored and snapped the mirrors and then couldn't
resist setting it up around the motherboard to see how cool it
looked, and also to get an idea of what to do next.
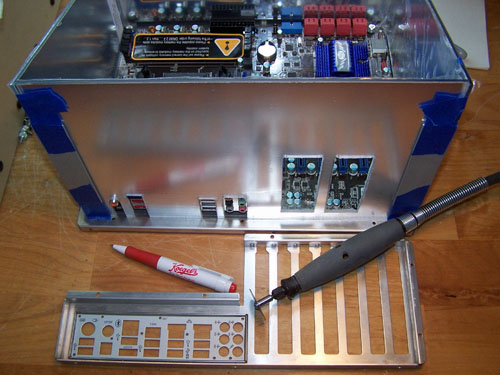
I used the back piece of motherboard tray and the
motherboard back plate as a template and then cut the sections of
mirror out using a ripsaw blade.
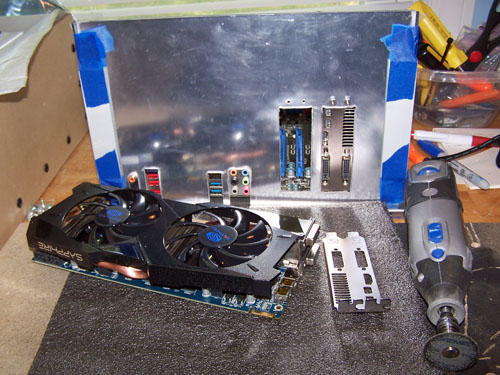
I had to modify the mounting bracket for both video
cards to make them fit right against the mirror panel, a Dremel and
a metal file made short work of it.
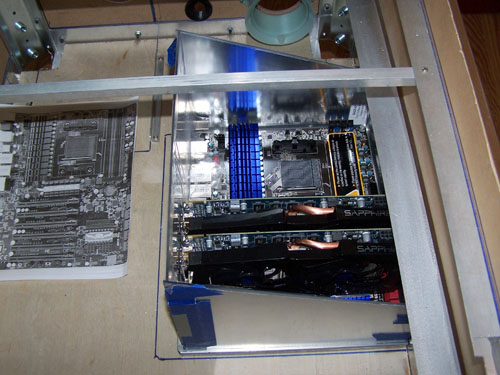
The next picture shows the illusion section test fit
inside the pinball table, everything looks good from this angle.
And it looks good from this side too, it's almost
ready for final assembly and installation.
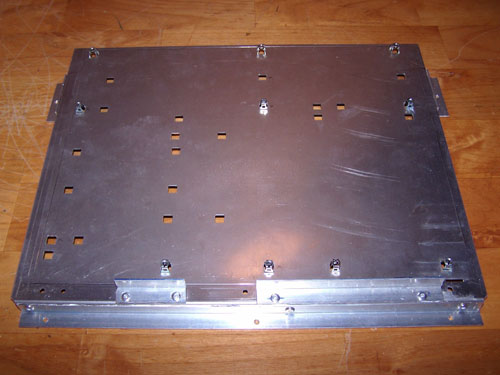
Below shows the finished modified motherboard tray, I
rivet a couple pieces of aluminum-angle onto the top of the tray to
hold the back mirror panel in place and I rivet a few more pieces of
alum-angle around the side edges as mounting points.
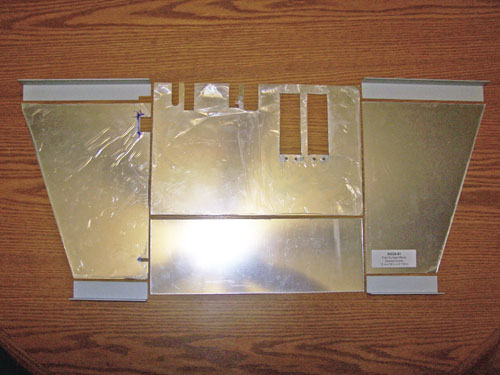
Next up are the mirror panels and pieces of
aluminum-angle that make up the illusion section, I'm waiting to
make two more cutouts into the mirror panel on the right before they
can be final installed onto the motherboard tray.
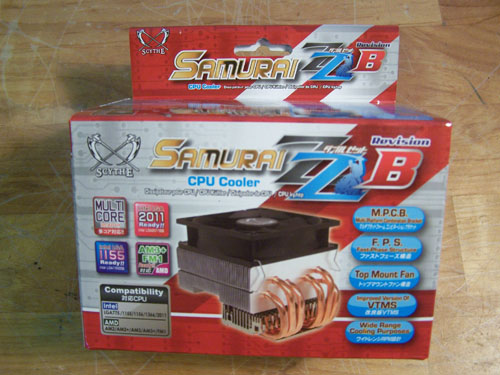
Another great company has officially come onboard as
a project sponsor, thanks go out to
Performance-PCs for supplying my pinball project with a kick-ass
Scythe Samurai-ZZ CPU cooler.

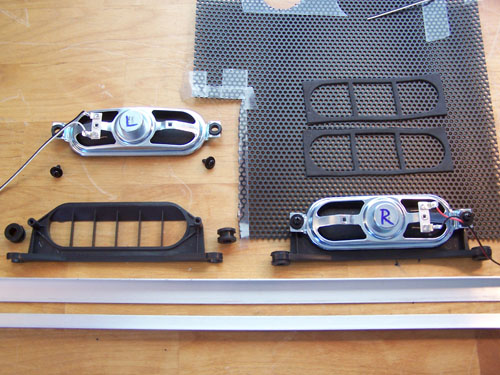
I removed the TV speakers from their plastic mounting
assemblies and then devised a fairly simple way to mount them into
the front of the pinball machine.
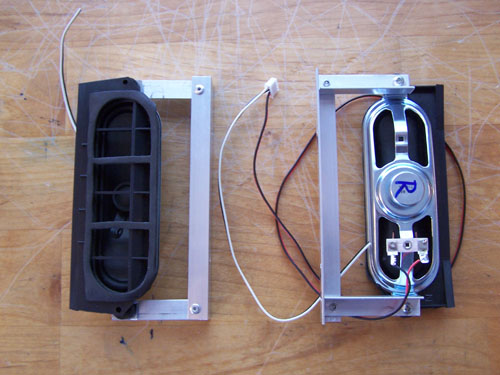
Below shows the aluminum angle and pop rivet solution
to mounting the speakers.
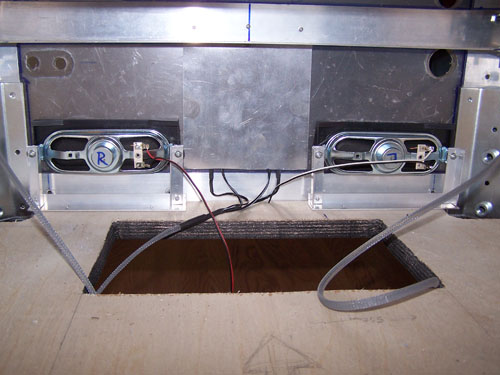
Here's a look from inside the table at the back of
both speakers being test fit.
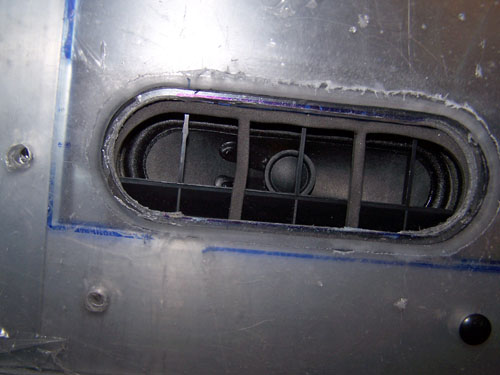
The bottom edge of the speaker has an angled piece of
plastic that should help to direct the sound upward toward the
player. The black plastic mesh covers I made will be fit over
the speakers during final assembly.
I rewired to lengthen and then sleeved the wiring to
the speakers to give them a more finished look, even though it will
never really be seen.

I removed the lower back panel and drilled three
holes into it to accommodate the rocker switches that will control
most of the lighting, while it was off I spray painted it black.
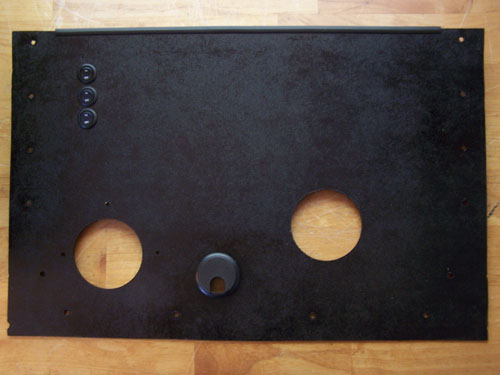
Below is a close up of the rocker switches...

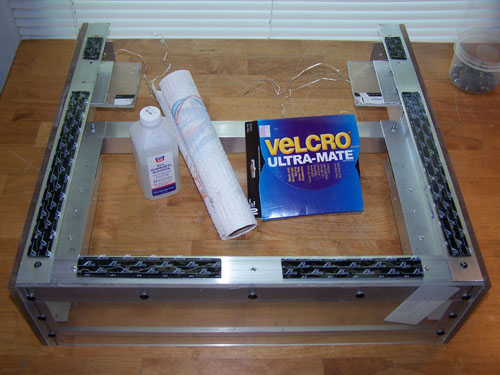
I put the back box face down and cleaned the back
pieces of aluminum angle with alcohol and a paper towel, then I cut,
positioned and stuck down some heavy duty Velcro.
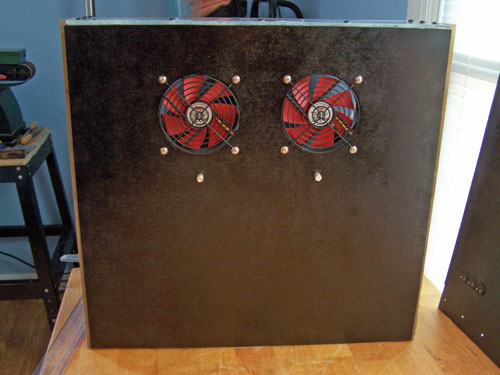
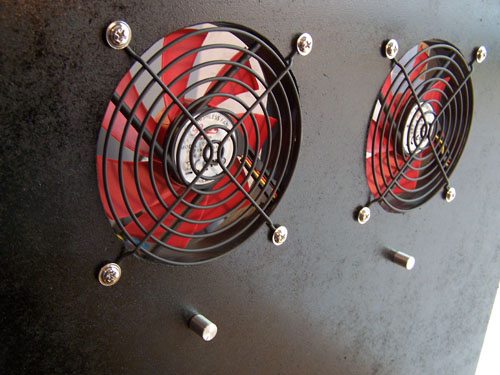
I painted the back panel to the back box black, I
also installed two 120mm fans and then lined up and stuck the panel
down onto the Velcro.
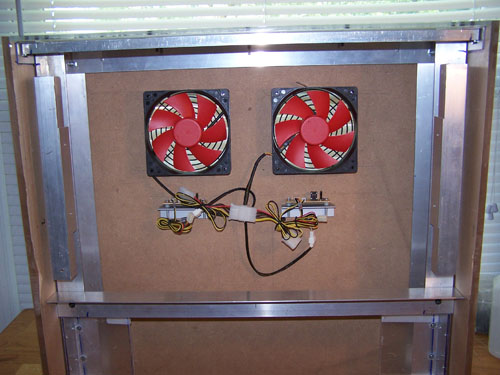
Here is a view from the inside of both 120mm fans and
fan controllers.
Close up shot of the freshly installed fans...
The
Performance-PCs sponsored Scythe Samurai-ZZ CPU cooler arrived
and I waste no time installing it.
Here is a shot of the CPU cooler in its new home
inside the illusion... the mirrors work great, CPU coolers appear to
go on as far as you can see.
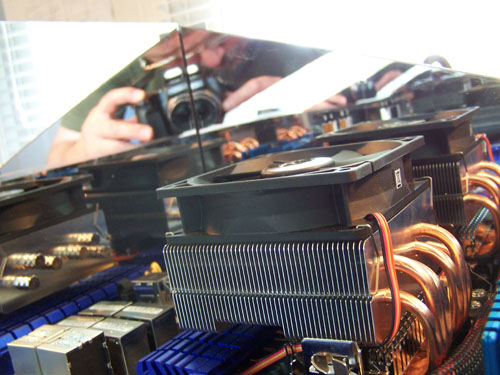
Another shot, this time looking over the CPU cooler
and into the illusion.

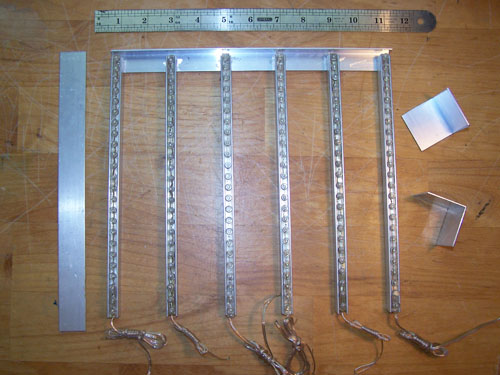
The only way the two-way mirror illusion will work is
if the lighting inside is brighter than the ambient light outside,
that said I cut some channel aluminum-angle the same length as the
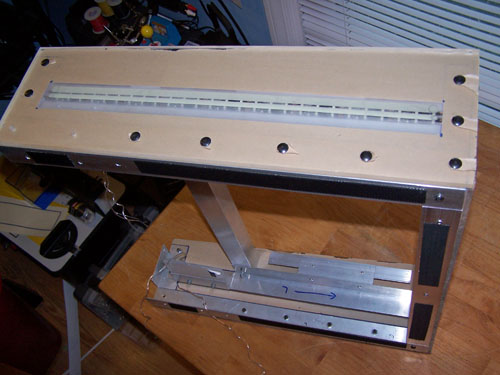
LED strips to make a lighting array.
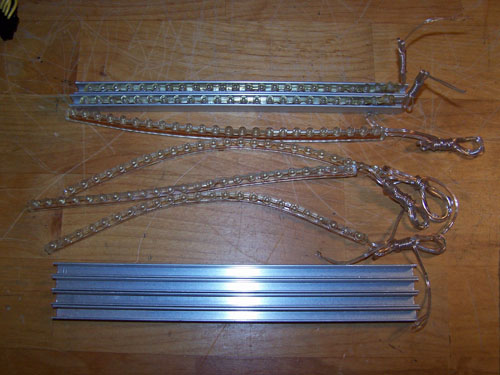
I attached the six pieces of channel aluminum-angle
to a length of corner angle with rivets and installed the light
strips into the channels, four white and two blue super bright LED
strips.
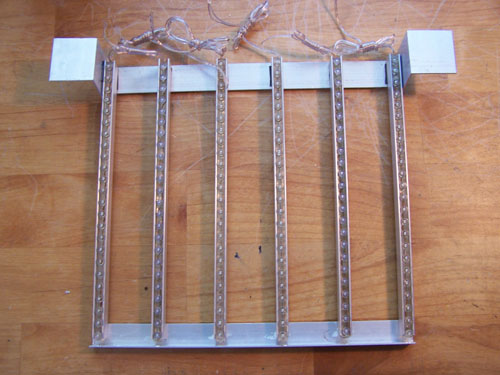
Below is the finished lighting array, the wiring will
receive the sleeve treatment when they are final installed.
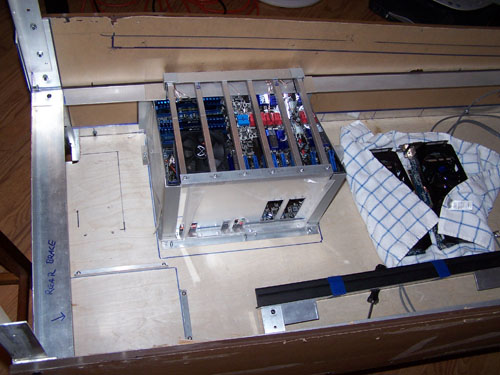
Here is how it looks on the illusion section, I will
be cutting the side rail to allow more light onto the motherboard.
Small problem though, the lighting makes the illusion section just a
bit too much taller and it sits directly below where one of the
circuit boards from the TV is located.
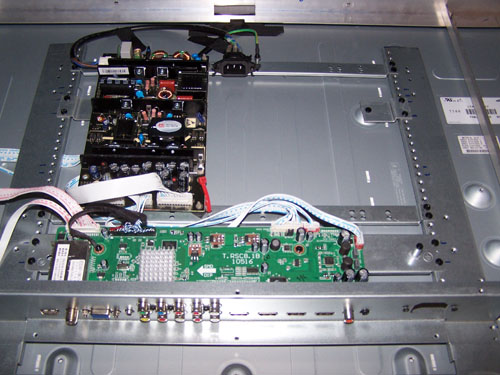
I would almost swear that this Sceptre TV was made to
be modified because moving stuff around on it is super easy.
Below shows the new power inlet and black power circuit board
placement, well out of the way now.
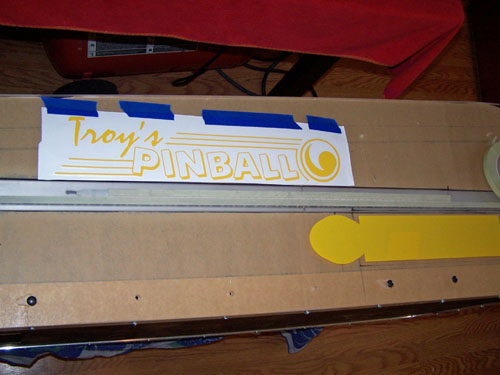
Since everything else is basically done it's time to
move on to masking for paint, well not really paint, it's actually
automotive vinyl color. I masked off a 3/8" and a 1/4" strip
over the SMD LEDs that run up sides of the back box.
Here is the front of the machine also prepped for
paint...
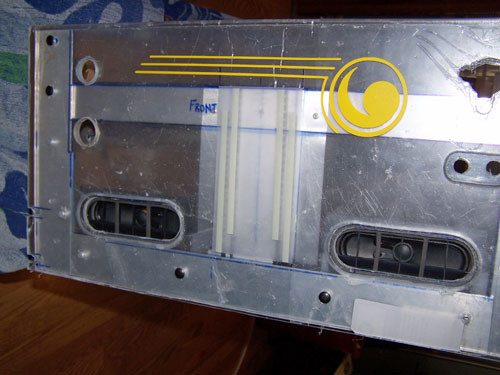
This next picture shows the installation of the side
vinyl masks, the two SMD LED strip locations were also masked off
with 3/8" tape.
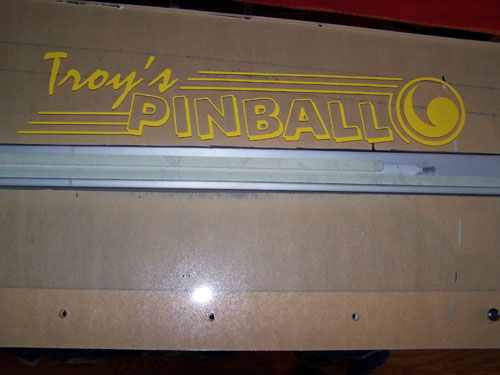
Here's a look at the installed vinyl mask and the SMD
location masking, vinyl color comes next and that means it's not far
now.
Troy's Pinball Build Log Page 5
