Work Log
Page 1 -
Page 2 -
Page 3 .
Page 4 -
Page 5 -
Page 6
I am happy to announce that
Sapphire is on board as
an official hardware sponsor for this build, I will be incorporating
an illusion that showcases their hardware into the pinball table to
thank them for being so awesome.

I'm pleased to announce that
AMD is also officially
on board as a hardware sponsor and want to thank them for supplying
my pinball project with a sweet quad-core Zambezi processor.

Another great company has officially come onboard as
a project sponsor, thanks go out to
Performance-PCs for
supplying my pinball project with a kick-ass Scythe Samurai-ZZ CPU
cooler.

Before I ever plunked a quarter into any video game as a kid I had
already played a fair amount of pinball, but it wasn't until I found
a
Williams Whirlwind machine in the early 90's that I truly knew
how much I loved playing.
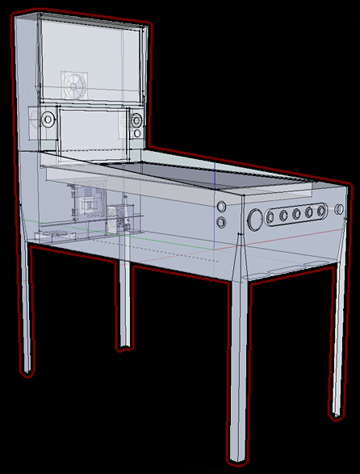
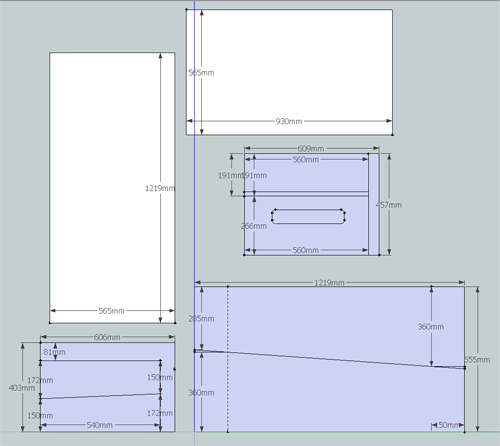
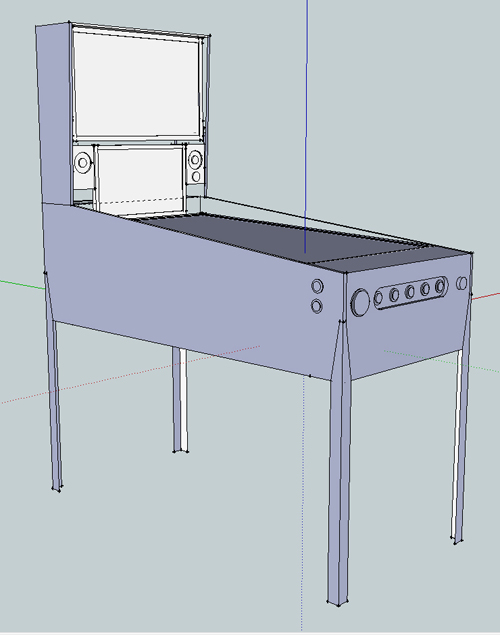
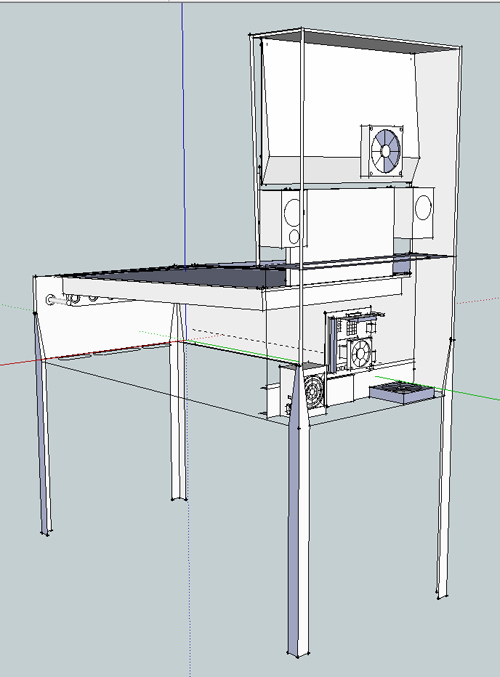
This article served as inspiration for my latest project, a
proper sequel to my bar top MAME build. Based off a Williams
wide body machine my Google Sketchup design is now final and all the
hardware/parts needed for the build are here.
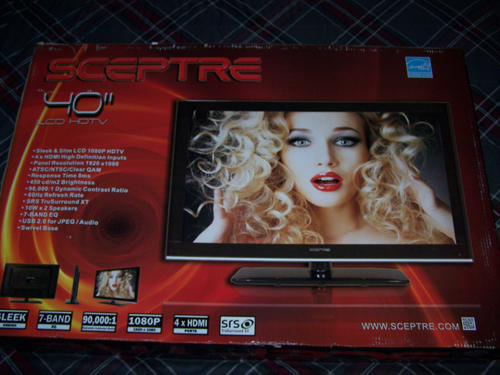
Sceptre 40" Class LCD 1080p 60Hz HDTV, X405BV-FHD,
1920 X 1080 @60hz, 16:9 Wide Screen, 8 ms, 400 (W) x 200 (H), Screen
size is 35" wide x 20" high (40" diagonal)
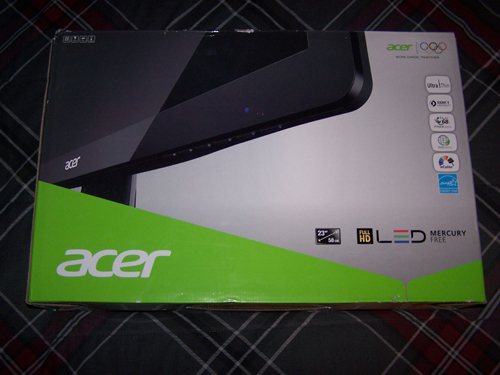
Acer S230HL Bmii 23" Class Widescreen LED Backlit Monitor - 1920 x
1080, 16:9, 100000000:1 Dynamic, 1000:1 Native, 60Hz, 5ms, HDMI, VGA
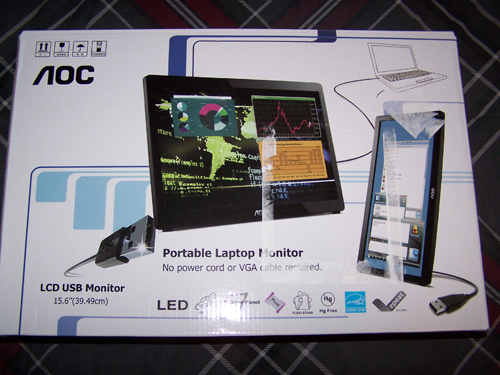
AOC e1649Fwu 16" Class Ultra Slim USB Portable LED Backlit Monitor -
1366 x 768, 16:9, 500:1 Native, 60Hz, 16ms, U-Slim
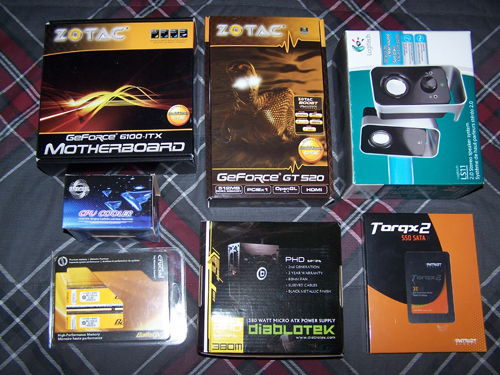
Below is a list of the hardware I will be using for
this build followed by a picture of it all...
-
ZOTAC GF6100-E-E AM3 / AM2+ / AM2 NVIDIA nForce 430 MCP Mini ITX
AMD Motherboard
-
ZOTAC ZT-50608-10L GeForce GT 520 (Fermi) 512MB 64-bit DDR3 PCI
Express x1 HDCP Ready Low Profile Ready Video Card
-
Logitech LS11 Stereo Speakers - 2.0 Channels, 3 Watts RMS, 2"
high-excursion metallic drivers
-
Patriot PT232GS25SSDR Torqx 2 32GB Solid State Drive - 32GB,
SATA I/II
-
Diablotek PHD Series PHD380M 380W Micro ATX Power Supply
-
Crucial Ballistix 2GB (2 x 1GB) 240-Pin DDR2 SDRAM DDR2 800 (PC2
6400) Dual Channel Kit Desktop Memory Model BL2KIT12864AA804
-
AMD Athlon 64X2 (ADO4000IAA5DD) CPU 2.1GHZ
-
EVERCOOL EC-NK804A-925EP 92mm Ever Lubricate CPU Cooler for AM2
and AM3 Series
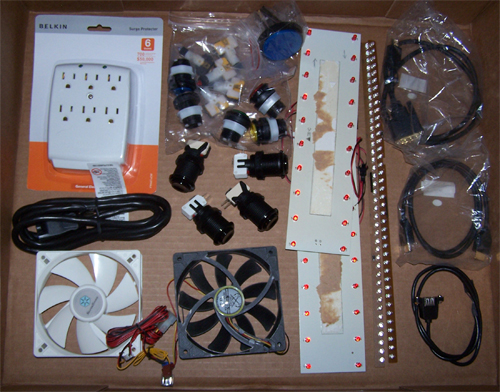
Below is a
Belkin 6-outlet surge protector, four pushbuttons and six lighted
pushbuttons, two 120mm fans (one speed controlled), two types of red
LED lighting, an HDMI and a DVI to HDMI cable, a USB internal to
external cable and a 6" extension cord/power cable.
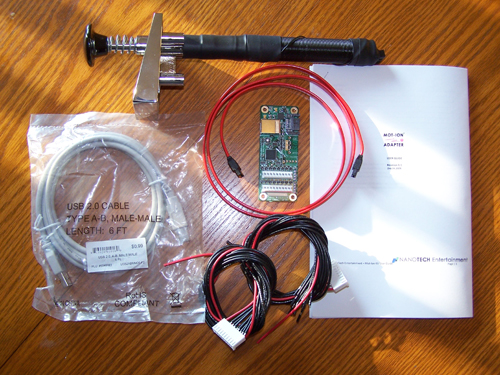
This next part took a total of 51 days from the day I
ordered it to receive it, so if you plan on building your own
pinball machine make sure to order the
Mot-Ion Adapter & Digital Plunger Kit at least two months before you
know you want it.
Below is
what will make up most of the enclosure, it consists of one Acrylic
Plexiglass Sheet Clear 3/8" x 23.7/8" x 15.7/8" and one 3/8"x 48" x
25.7/8" sheet, two sheets of OPTIX acrylic 3/16" x 18" x 24", three
8" x 1 1/2" lengths of corner Alum-Angle, four black 28" Williams
pinball table legs and the mounting brackets, bolts and four leg
levelers that go with them.

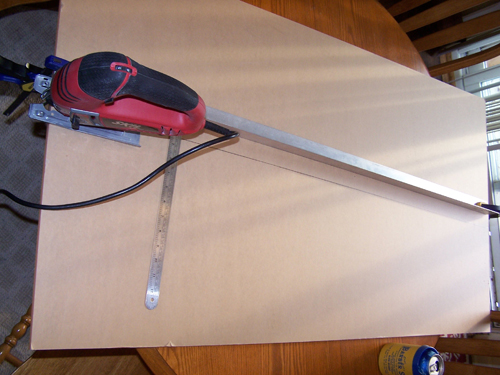
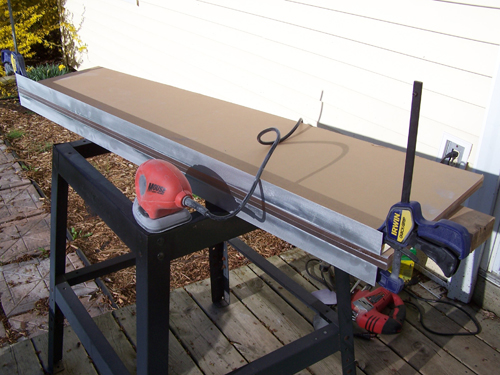
I cut one of the 8 foot lengths of Alum-Angle in half
and clamped it onto the 48"x26" sheet of 3/8" thick acrylic to use
as a guide for the jigsaw.
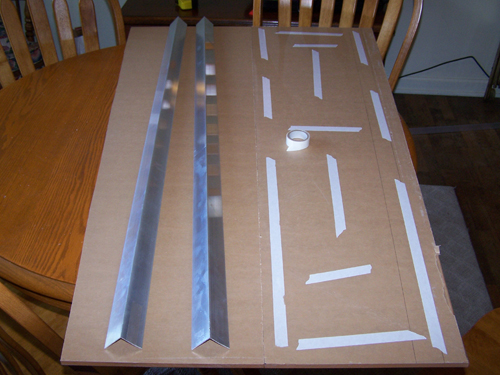
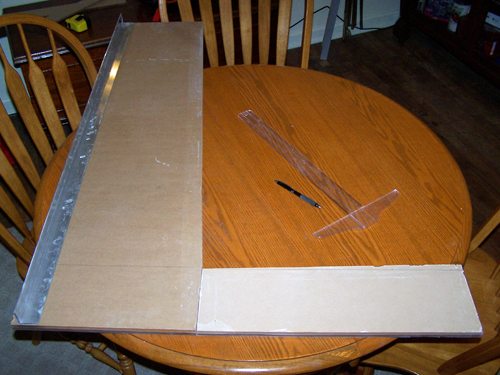
It is difficult to get an exactly straight even cut,
so the side panels will be double sided taped together in
preparation for sanding. The two four foot sections of
Alum-Angle will be taped onto the edges as guides to keep my sanding
even and let me know when to stop.
Forever later and it's sanded pretty even, below
shows the taped and clamped Alum-Angle / Acrylic and Mouse sander.
I cut both sides of the of the marquee and sanded
them like I did to the side panels. It still needs a little
work, but the following picture shows just how massive this thing
is.
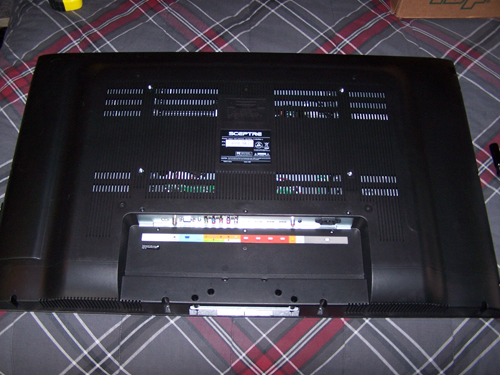
Here is the back of the 40" LCD, it will have to be
removed to allow for accurate measurement of the LCD screen.
Screws removed and back cover off - the speakers, IR
receiver and TV side controls will all be removed and then relocated inside the body of the
pinball table. While I was looking at the back of the screen I
noticed that my Sceptre LCD contains parts stamped Samsung.
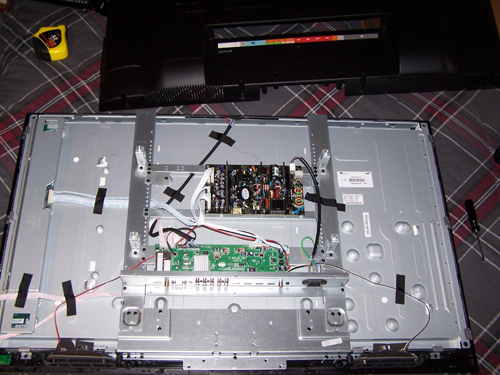
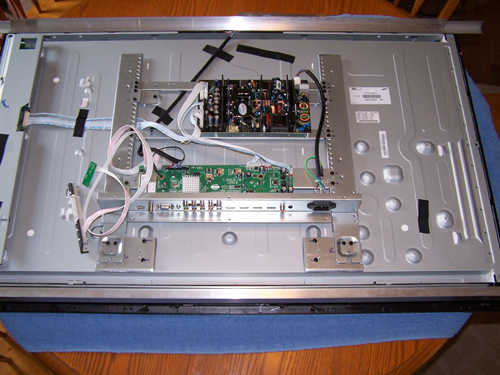
Ok, in this next picture all the stuff I mentioned
removing above has been, plus you can see where I cut away any steel
bits that were in the way. I also cut two lengths of
Alum-angle that will run up the edges and serve as the mounting
rails for the screen.
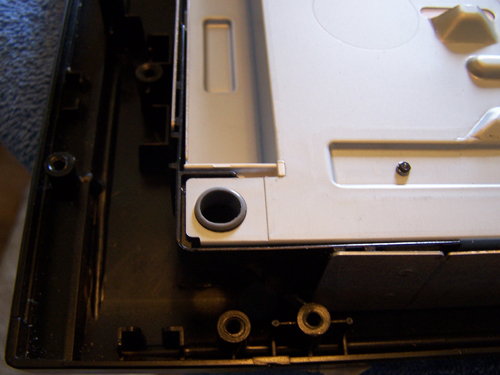
There is a rubber grommet lined hole like this in
each corner of the screen, all four are ready made to be the points
at which the side rails attach to the screen.
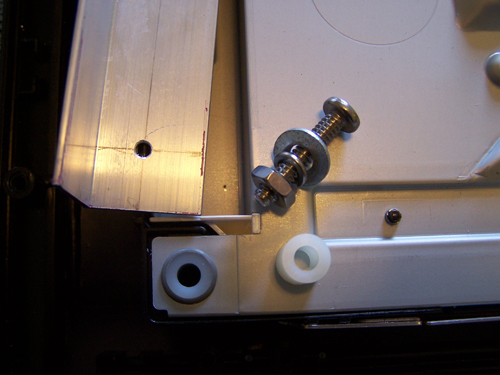
I bought four nylon spacers and they fit snug against
the rubber grommets inside the holes, the bolt, washer, lock washer,
nut combo will hold the rails down.
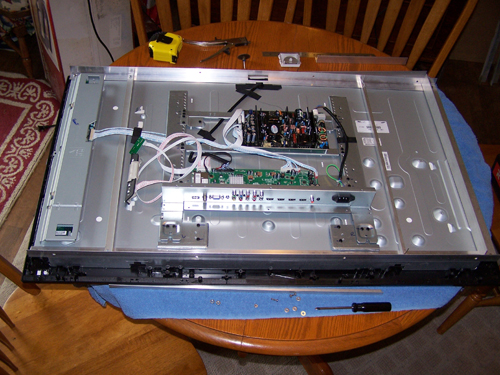
I cut a corner section out of the middle of one of
the side rails to allow a ribbon cable to pass through. The
side rails were mounted and then marked for the placement of three
Alum-Angle brace rails that were then then measured, cut and
installed. Below shows the modified 40" LCD screen all
finished up and ready to mount.
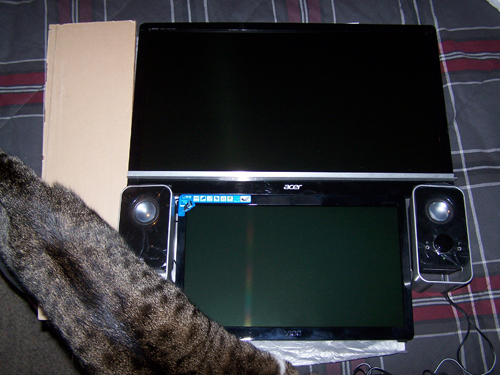
Below shows the test fit of parts that will make up
the back glass and a cat who thinks that laying down on top of it
all is somehow helpful. If you look closely at the 23" Acer
monitor you can see a length of Alum-Angle that was initially going
to be a support brace on the back of the 40" LCD TV, it is the same
exact width as the 23" monitor... which means that everything
should fit in nice and tight.
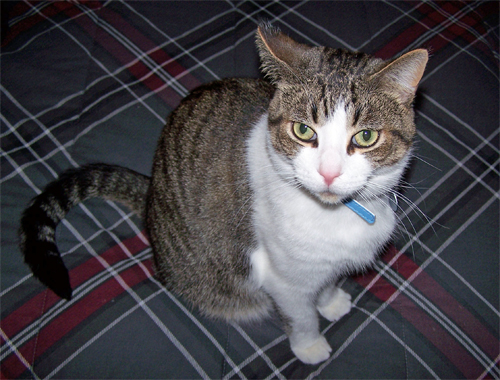
Here is a better look at my helper, his name is
Boozie... he isn't super bright but he is super friendly, so I cut
him slack whenever his wacky cat antics slow me down.
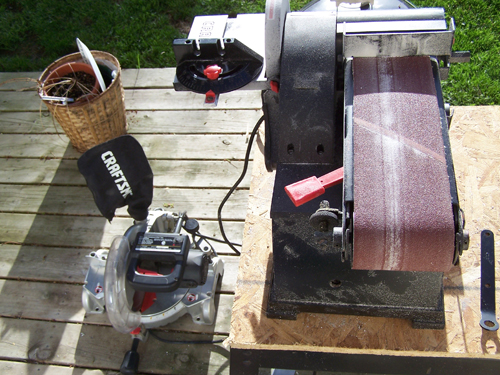
I cut some beefy 2" Alum-angle with my chop saw and
used my disk/belt sander to smooth it up.
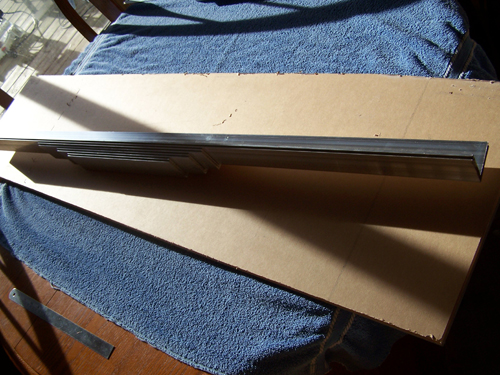
Below shows what $100 of Alum-angle and another $100
in acrylic looks like cut up.
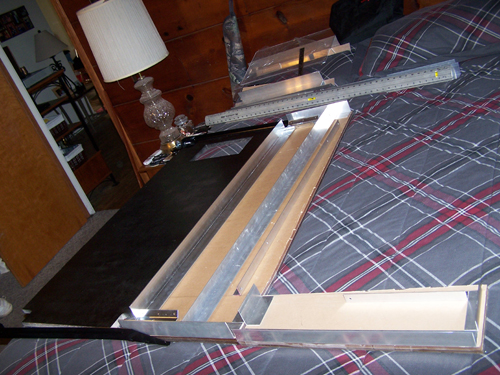
Here is the whole thing laid out on my bed, including
the legs and a bottom panel made of plywood that was cut to size and
painted black.
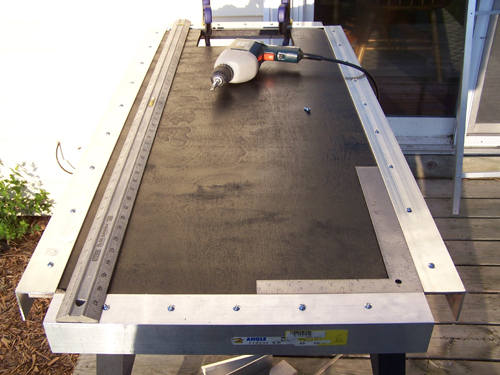
I drilled evenly spaced holes into the Alum-angle and
attached all four lengths to the bottom panel using wood screws.
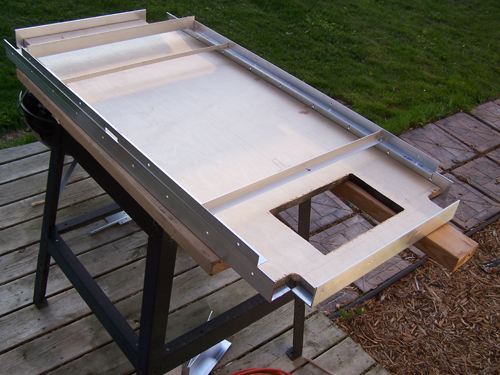
Here is a shot of the inside of the base, the
rectangular hole in the plywood orients to the front and will
provide quick access to the backs of the buttons, the TV and speaker
controls, fan control, etc.
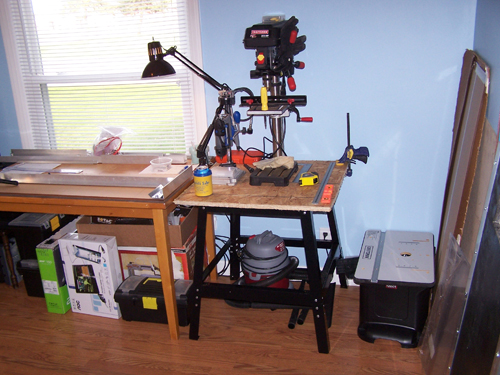
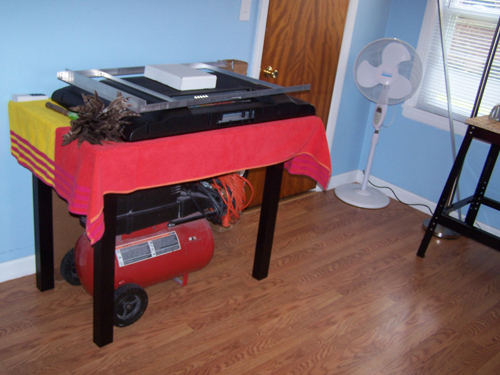
I got fed up with working off of my bed and dining
room table, since I have more projects going on than we ever do
guests staying over it really was a no brainer - goodbye guest
bedroom, hello new workshop. Below is the view from the front
door looking in...
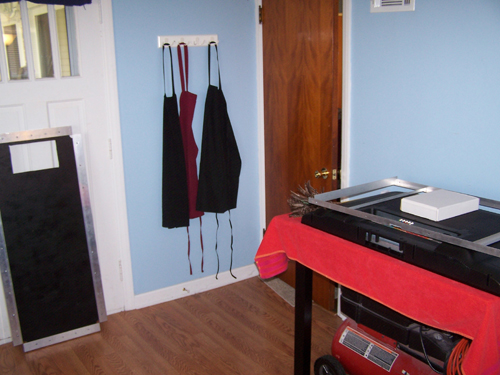
Directly to the left of the last picture...

Left again, the door in the corner is a closet...
Take one last left and we have the entry door and an
exterior door... and that concludes the tour of my workshop.
Now that I have a dedicated work space where I am not constantly
getting stuff out and then having to put it away each night should
help speed everything up.
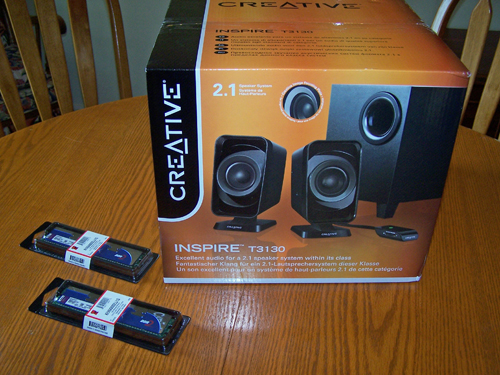
I decided to make a couple of hardware changes, first
up I am ditching the 2GB of Crucial Ballistix memory in favor of 4GB
of Kingston Hyper-X, because more is better and they are lower
latency.
Secondly, the Logitech speakers work great in
my MAME machine, but they are right in your
face. At 1.5w per speaker I can't imagine they'd sound as good
four feet away, another negative is the
volume control knob would have stuck out from the back glass.
My new Creative Inspire T3130 speakers are 25w total with 5w each
satellite and 15w for the subwoofer are a better fit for this
project and the volume controls can now be easily hidden.
Troy's
Pinball Build Log Page 2
