|
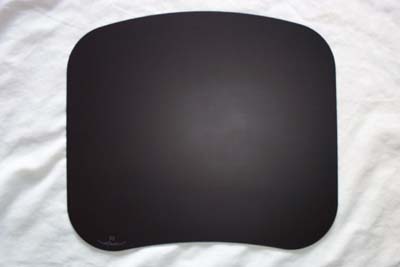
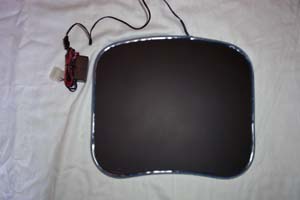
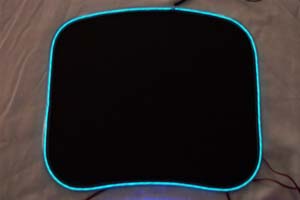
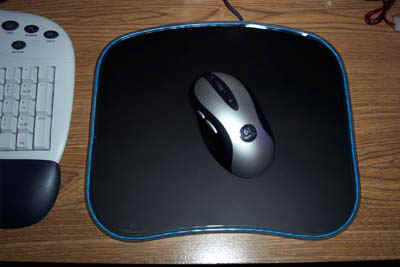
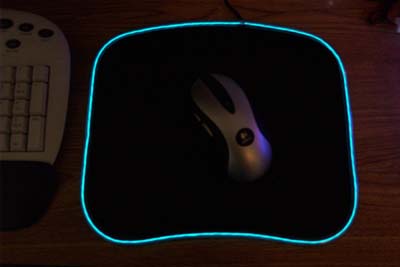
Steelpad 4S Mod Ok, first off the Steelpad 4S is a mouse pad that doesn't really need modding (it looks sweet right out of the box) but in the sites tradition to try and mod everything it too shall be modded. First thought... blue. It has to be blue to match my case theme and existing desk mods and with that the idea to accent the outer shape of the pad by trimming the edge with blue EL wire was born. Powering the blue EL wire is no problem since I have already built and modded a testing PSU, so all I have to do after the pad is modded is plug the inverter into one of the (glowing) molex connectors from my Atomic MOBY desktop PSU and presto... a blue glowing mouse pad. Did I mention that the mod cost less than $15.00?
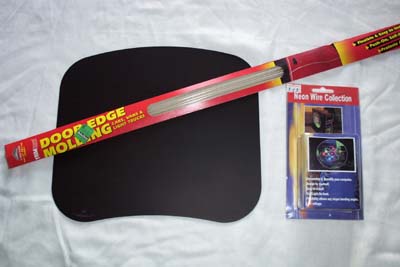
Materials: All you need for this mod is a Steelpad 4S, a 5' glo-wire kit in any color and some clear automotive door edge molding. EL wire is a great product, but the biggest problem with it (other than the EL inverter noise) has always been how best to adhere it to where you want it, my solution has always been door edge molding. The cool thing about door edge molding is that it has a bead of glue in the channel that helps to hold it in place, and there is enough room in the channel for EL wire.
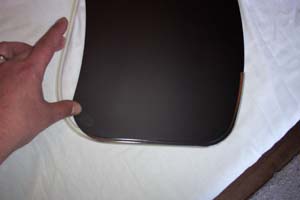
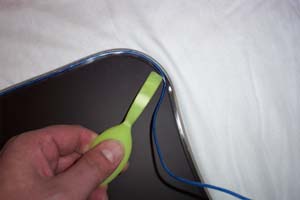
Process: I started edging the mouse pad with the molding at the top, just to the right of the topmost rubber foot. I continued around until the door edge molding ran out, then I grabbed another strip and continued around until I got to where I started. I cut the piece a little bigger than needed and left it unattached, then I cut a part of the back of the edge molding out so that the wires could be fed through. I began running the EL wire at the side of the molding I didn't cut, starting right at the heat shrink connection to the wiring.
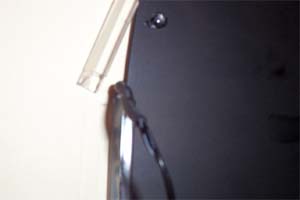
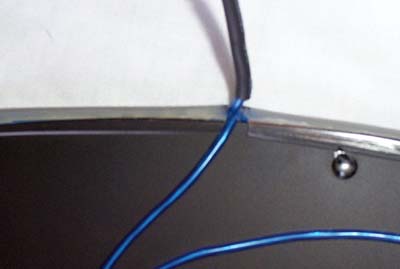
I pushed the EL wire under the molding on the face of the mouse pad and then used my all purpose tool (green plastic spoon) to run it the rest of the way around the pad. I slid the handle of the spoon beneath the edge molding and held the EL wire taught and it ran the entire length with out a snag. I went back over it with the spoon handle a second time to make sure the EL wire was even all around. When the EL wire met back up with itself I then cut the edge of the molding that had been left unattached so that it fit flush against the other side of the molding and stuck it down.
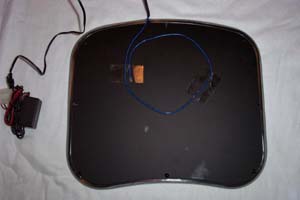
The excess EL wire was wrapped in a circle and taped to the back of the mouse pad. Flip it over and make any adjustments to the EL wire or door edge molding necessary. I found that the edge molding tended to buckle up around the corners of the pad but after a little coaxing it did lay down pretty good. All that's left now is to plug it in, fire it up and see this thing glow...
Finished: Well, now that's pretty. A simple mod for under fifteen bucks that took all of fifteen minutes to accomplish. Have a tall cold beer and congratulate yourself on yet another mod well done.
Happy Modding - Guide written by ARTbyTROY |
|
Disclaimer: This how-to guide is presented for informative purposes only. CaseModGod.com can not and will not be held responsible for damages to or resulting from anything that you may decide to do to your case or hardware and also can not and will not be held responsible for injury to your self or others as a result of attempting any of the things that are shown on this site. Basically you are responsible for your own actions whether said actions were based on information garnered from this site or elsewhere, learn to deal with it. |