|
2X16 Character Serial LCD Hack and Mod by Arem. I've had a basicx24 with development board and serial LCD laying around since Christmas about 2 years ago. As amazing as that little micro-controller is, I haven't really found any wonderful projects to use it for yet. While looking through the documentation for the LCD however, I noticed that it could be connected to a PC serial port as well as to the micro-controller. The budding case modder in me filed it away for a rainy day. Having recently upgraded my PC and replaced my beige box with a halfway-decent case, I finally decided it was time to do a little modding. One of the first things I thought of was that LCD. So da Sammy T and I went to work.
Parts/Tools Required:
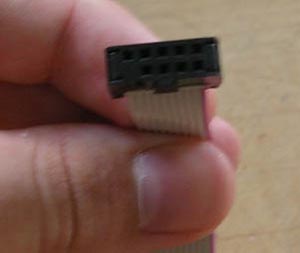
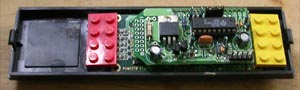
Building The Cable: Perhaps the most indefinite part of this guide is the building of the cable. I was able to find some junk laying around my house to use. Let me tell you, I have no idea what the piece of cable that plugs into the LCD itself is supposed to be used for. I just noticed it had 5 holes and the LCD had 5 pins. So I figured I could get it to work. Here's what it looks like.
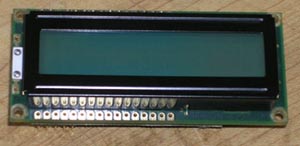
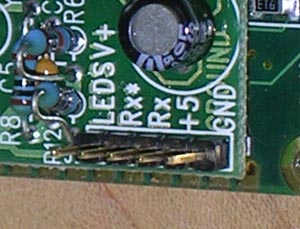
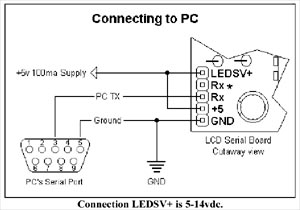
Alright. If you find a cable with 5 holes that are spaced correctly, you are ready to go. The people that built this LCD were kind enough to label all the pins nicely, since it's intended for use in hobby projects. Basically what needs to happen is that you need to get a 5 volt 150 mA power supply hooked into the +5 and the LEDSV+ pin (Warning: do not try to use the power supply of any serial/LPT port. They are not designed to provide that kind of amperage.), you need to get Rx wired to Transmit (pin 3) of a COM Port and GND wired to Ground (pin 5) of the same port. To start, I recommend using a battery and a multimeter to find out which hole on your cable goes to which wire on the cable. They are often not wired in order.
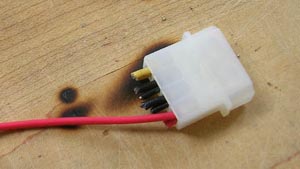
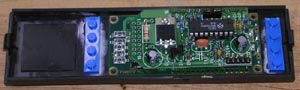
Wiring the power is pretty easy. Although USB would work just as well, I chose to sip the 5 volts directly from my power supply. Using a SATA power cable I had laying around, I cut off everything but one of the red power cables (black is ground, yellow is 12 volt).
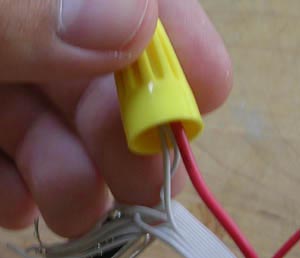
To get that 5 volt line connected to my screen, I stripped the wires on the power side and the wires on the LCD side that were connected to LEDSV+ and +5 and tied them all together with a nice wire nut.
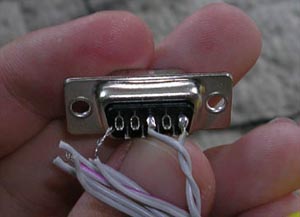
Getting Rx and GND connected to pins 3 and 5 (respectively) of the COM Port was a simple matter of soldering the wires onto the D-SUB connector. You might want to verify pin numbers with a pinout before you get started on this.
If you've done that all correctly, you can give yourself a pat on the back. You're halfway through!
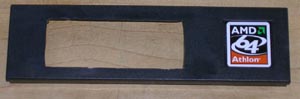
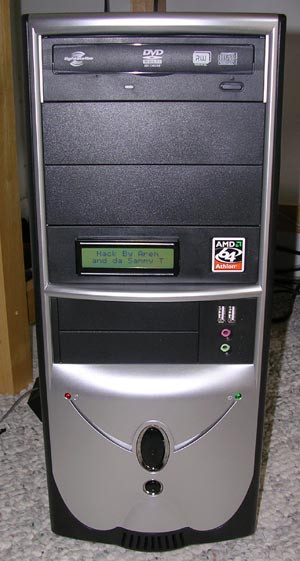
Preparing The Case: Depending on your skills with tools, this could be the easiest or hardest part of the hack. To get started, go ahead and pop out a drive bay blank from your computer. (Or mount it somewhere else. Be creative!) The documentation for the LCD has plenty of size information, but I found it easy to just trace the LCD and cut a little inside the lines. You can always make the hole bigger! I started out by cutting a hole with a jig saw, then, with LCD in hand to check continually, I carefully enlarged the hole with an exacto knife. Once it was nearly right, I fine-tuned it with a file. If you have a dremel, you can probably do a MUCH nicer job than I did.
Since I thought mounting the screen with screws was a little distasteful, but I still wanted the LCD to be secure and removable, I devised another method of mounting it. Legos are a tool no case modder should be without. I used the thin kind to build an L shaped bracket which I superglued to the back of the drive cover. The screen is kept nice and secure.
If I ever want to remove the LCD, I can simply pop off the top legos and pull it right out! At this point, you can connect the cable (I reccommend running it through the case) and pop the drive blank back into its original position. You're nearly done!
The Software: As far as I can tell, there is no software made specifically for controlling these, so you're gonna have to write your own. Fortunately, using da Sammy T's DLL, all you have to do is make a few function calls to get it working. The functions are as follows:
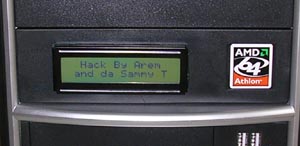
If you leave the jumpers on the back of the screen at their default settings (which I would recommend), you should use 9600 baud, 8 bytes, 0 parity and 0 stop bits. The port should be \\.\COM1 (provided you are using COM 1). CreatePortAccess will return a unique ID that you can use to access the port using the other functions. For programmers, the working of this should be self-explanatory, if not familiar. Although the screen should display text just fine at this point, the documentation lists unique characters that can be sent to change the backlight (contrary to the documentation, 1 is the lowest allowable backlight value), clear the screen, advance to the next line or do any number of useful things. It also supports the ability to define and display custom characters. There are any number of things this little display could be used for, from displaying Winamp track information to CPU temperature or usage statistics to small, custom games. I'd love to see some of the stuff people do with this so be sure to share! I nearly forgot... Eye candy!
A close-up of the completed 2X16 serial LCD mod, Lego's are now a serious modding tool and you have to admit... the mod is pretty sweet.
Happy Modding - Guide written by CMG forums member Arem |
|
Disclaimer: This how-to guide is presented for informative purposes only. CaseModGod.com can not and will not be held responsible for damages to or resulting from anything that you may decide to do to your case or hardware and also can not and will not be held responsible for injury to your self or others as a result of attempting any of the things that are shown on this site. Basically you are responsible for your own actions whether said actions were based on information garnered from this site or elsewhere, learn to deal with it. |