|
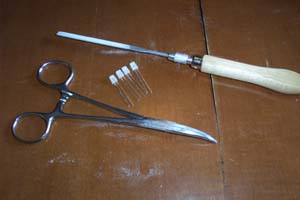
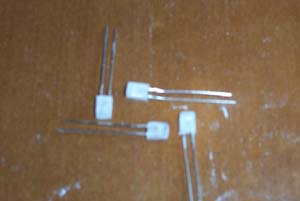
I will be putting LED's into the molex ends of my PSU to light them up blue. Since the only LED's I could find in 5v were 5mm some filing was in order. Hold the LED with the hemostats and use the hobby file to square them off. Be careful not to take too much off, constantly check all sides as you go.
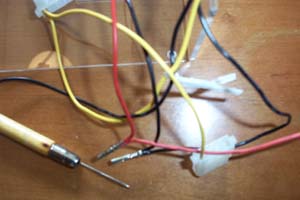
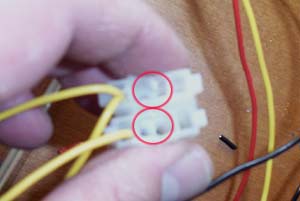
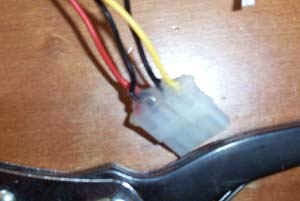
Use the needle tool to remove the 5v and both ground pins from the molex end, there are tabs on the edge of the pin that you push in to allow its removal. Take the dremel and remove the center plastic piece (circled in red) from the molex to allow the LED to fit inside.
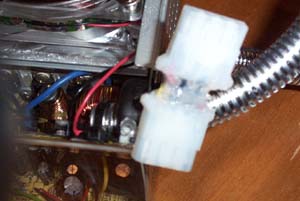
Solder the LED to the base of the 5v and ground pins and carefully cram it all back together. I used some silicone around the molex to cover the bare LED leads. When the molex were all outfit with an LED I used the chrome loom to cover all the wires.
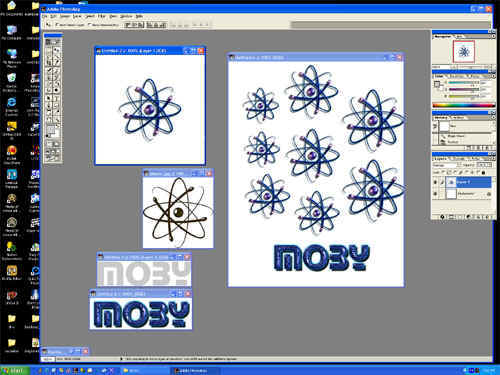
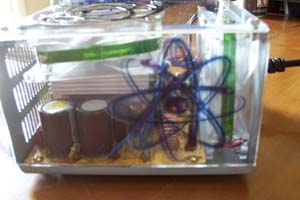
I knew I wanted some type of design on my PSU, but I wanted color, a dull gray etch or applique simply would not do. Time for some Photoshop action. I got my images lined up and then printed them out in grayscale to make sure they would fit the PSU. Then I reversed the images and print them out on some ink jet window decal paper.
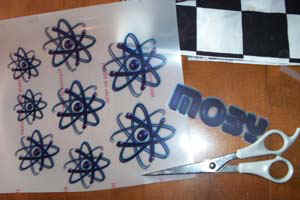
I carefully cut out my images with a pair of scissors, cutting as close to the edges of the image as possible. Then it is just a matter of cleaning the acrylic and applying the appliques to the inside of the cover.
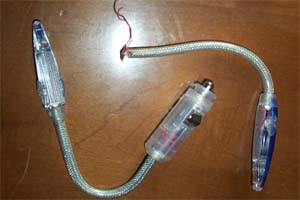
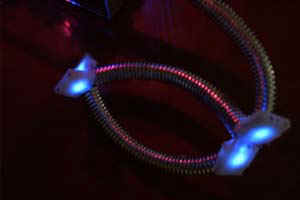
Although the next couple of steps are not entirely illustrated they are still quite straightforward. I took the automotive LED light sticks and prepped them by removing the cigarette adapter end and soldering some longer wires onto them. I used heat shrink tubing on the ends to prevent electrical shorts and marked the position for them on both the acrylic cover and the top metal edge of the PSU. Using a nibbler I removed the metal from the edge of the PSU, I then used a dremel with a round grinding stone to notch out the acrylic (circled in red). I drilled a small hole on each side of the PSU and used clips for a coaxial cable and some small nuts and bolts to secure the light sticks to the sides of the PSU.
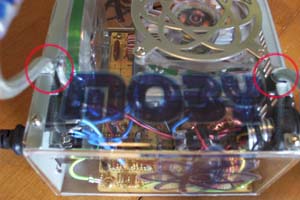
While I was at it I also added a couple leftover blue LED's to the inside of the PSU (circled) that I inserted into the ends of an old SPDIF cable that I cut in half. I wired everything to power and then put it all back together. Each light stick has a switch on it's side so they can be turned off when not needed. Since the screws that had originally held the metal PSU cover on were too short to hold it together with it's new acrylic cover I used some long motherboard mounting screws that were the same diameter and thread type.
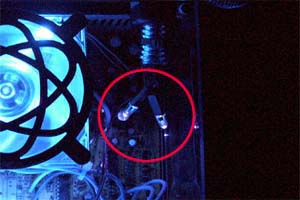
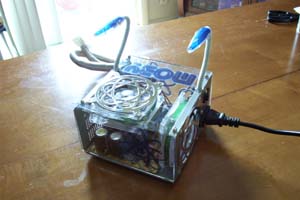
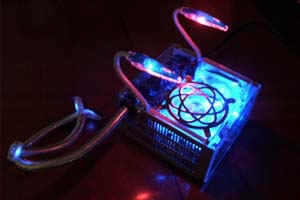
Below are pictures of the desktop PSU all lit up. The LED lightsticks are not as bright as I would have liked and were initially put there to shine light onto my desk. They are still cool though and give my PSU a "war of the worlds" look which is perfect since it is going into battle. I didn't want the molex ends to be overly bright and the 300 mcd LED's do a nice job of highlighting them without being overkill.
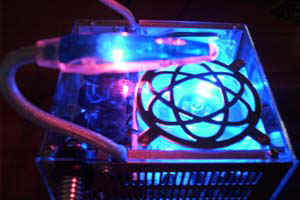
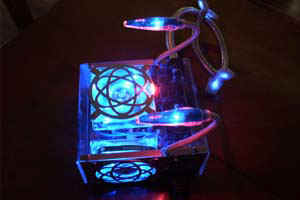
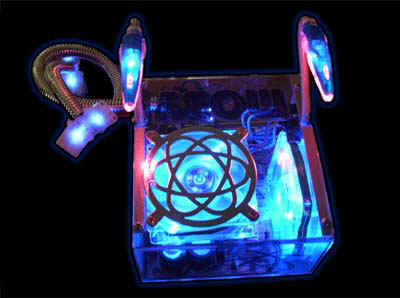
Below are a couple more pictures showing the PSU in all it's glowing glory.
Happy Modding - Guide written by ARTbyTROY |
|
Disclaimer: This how-to guide is presented for informative purposes only. CaseModGod.com can not and will not be held responsible for damages to or resulting from anything that you may decide to do to your case or hardware and also can not and will not be held responsible for injury to your self or others as a result of attempting any of the things that are shown on this site. Basically you are responsible for your own actions whether said actions were based on information garnered from this site or elsewhere, learn to deal with it. |