|
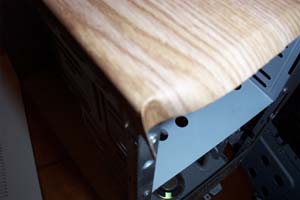
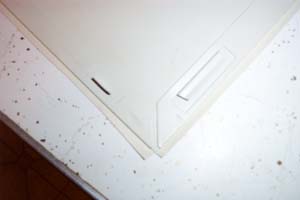
Now that the vinyl dyeing is out of the way it's time to start using the contact paper to cover the case. I started with the top of the case by laying the contact paper over it and getting a rough measurement of how much I would need to cover it, you will want to leave a little excess on the side edges as well as the front and back. Cut your piece of contact paper with the X-Acto knife, remove the backing and press it into place. The good thing about contact paper is that if you don't get everything lined up with the first try it is very forgiving and will easily come off and allow you to reposition it for as many tries as it takes to get it right. Smooth out any air bubbles in the contact paper using your hand. Pinch the corners together as shown in the picture below and run the X-Acto up the crease (do not cut too far up though) only go to the corner of the case. Cut the excess corner pieces off and smooth everything down.
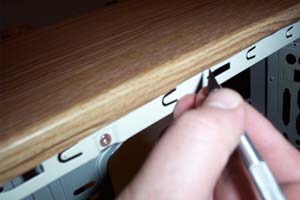
Next move to the side edges of the case where the contact paper hangs down and cut off the excess with the X-Acto knife. Leave a little excees hanging over, just cut enough of it off to allow for the holes that hold the door on to show.
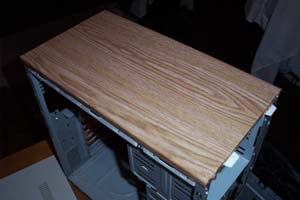
The finished top should look like this, take a break and have another beer.
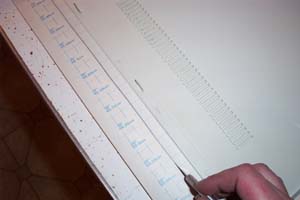
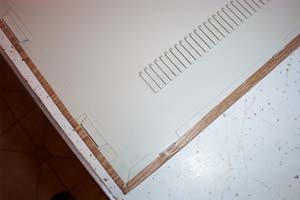
Now it's time to do the side panels. First I laid the case door down onto the contact paper that was rolled out. Then I cut it with the X-Acto knife leaving about a half inch excess on all sides. The back of the contact paper has lines that make cutting it straight very easy.
Flip the side panel over and remove the backing from the contact paper. Adhere the contact paper to the side panel and rub any air bubbles out with your hand. Place the panel contact paper side down and cut all the corners as shown in the picture below.
Fold the edges of the contact paper onto the back of the case. Repeat the process for the other side panel.
Now it's time to reassemble the whole thing, screw the freshly painted front panel on first and reinstall the drives and drive blanks. Then put the side panels back on.
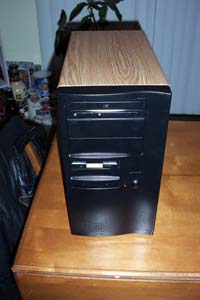
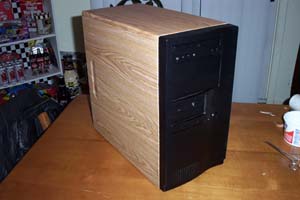
Looks pretty sharp, doesn't it. The vinyl dye cost me $6.66 and the contact paper was $2.99 for a nine foot roll which brings this mod in under the ten dollar mark (the six pack of beer cost extra and was not factored into the final cost). Below is another picture of the finished product.
Surprising that an old throw away case could have new life breathed into it with ten bucks and two hours worth of work. Have another beer (or two) and congratulate yourself on completing a kick ass mod. Happy Modding - Guide written by ARTbyTROY |
|
Disclaimer: This how-to guide is presented for informative purposes only. CaseModGod.com can not and will not be held responsible for damages to or resulting from anything that you may decide to do to your case or hardware and also can not and will not be held responsible for injury to your self or others as a result of attempting any of the things that are shown on this site. Basically you are responsible for your own actions whether said actions were based on information garnered from this site or elsewhere, learn to deal with it. |