|
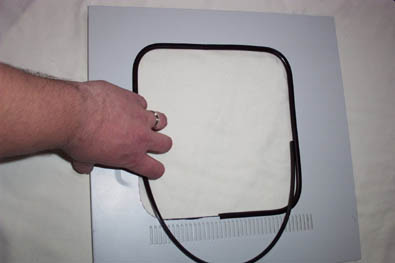
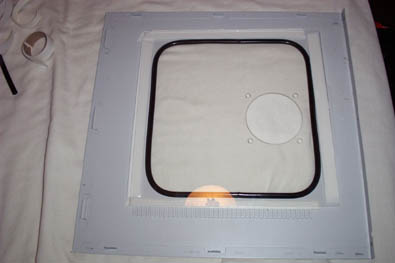
After the window is completely cut out remove the masking tape and have a beer. Now it’s time to grab one piece of the door edge molding and start outlining the window. The auto door molding comes in colors other than black, the auto store I got it from had chrome, gold and two tone as well, but black is the most flexible. The molding has glue inside the channel and does a good job of holding it in place. Start at the center of one of the sides and continue around until you have ½ of the window trimmed, cut off the extra molding with scissors making sure that the cut is straight. Get the second piece of molding and start where you left off with the first and continue until you are back to where you started. It is a good idea to cut this piece a little longer than you think you will need and test it for fit, if you need to take off more it’s better than having it too short.
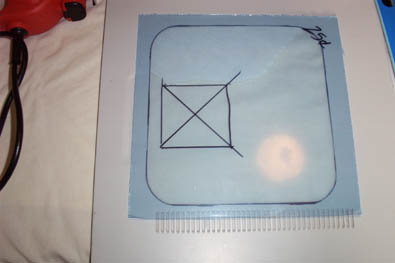
Set the door panel aside and pick up the plexi-glass, if you want a fan hole now is the time to mark out its position (optimally it should be placed where it will blow across the graphics card and the processor). To do this I traced the fan onto the plexi with a marker and made an X from corner to corner to get my center mark.
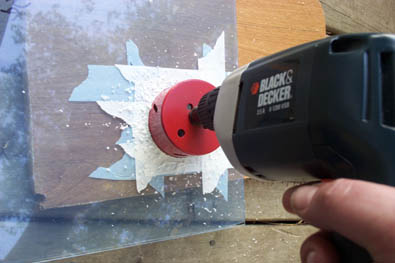
Use the masking tape on both sides of the plexi-glass making sure to extend a little beyond the traced outline of the fan. The masking tape adds strength to the window and will help to keep it from cracking when you drill a fan hole. Take your variable speed drill and 80mm (3 ¼”) hole saw and position it so that the pilot bit is on your center mark, slowly start drilling just until the bit goes completely through then stop. Flip the switch on the drill to reverse and start cutting the hole, going forward sometimes causes the hole saw to bind up and I have found going in reverse after the pilot is drilled through works a lot better and it seldom binds up. If the holesaw does bind up DO NOT rock it back and forth, doing so will almost always cause the plexi to crack.
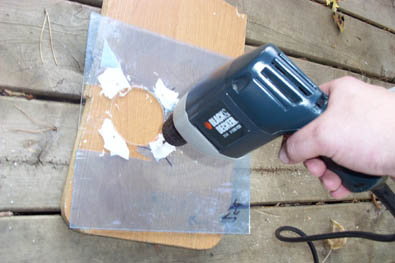
So you have a hole in the plexi, now you need holes for the screws to mount your fan. The best way to achieve this is to use the fan grill and set it upside down in the hole you just cut. Line it up straight and tape it down so it doesn’t move and mark the holes with the sharpie marker. Use the masking tape over your marks both front and back, they will show through the tape. I used a 7/32” drill bit which is larger than the screw holes for the fan, the reason for this is that it seldom lines up right the first try and makes it easier if it’s a little big. Also, most fan screws cut as you tighten them and if the holes are too small you could crack the plexi when you screw them in. Slowly start drilling the screw holes and go just until you cut through, you will know when to stop as the plexi usually jumps up a bit when you make it through. Set the drill to reverse again and clean up the hole. Do the other three and then test it for fit using the fan. If it doesn’t line up perfect you can use the dremel to line the holes up better. If you have tape residue on the window use some Goo Gone to clean it off and then have another beer.
Pick up the door and place it inside up and grab the double sided tape. Lay the tape to the edge of the window molding on all sides. I double layered the tape on all sides except the bottom edge where the vents are to compensate for the thickness of the molding. Clean and then carefully position the plexi-glass onto the tape taking note of the fan hole position. I didn’t take a picture of it but as an added measure I also used some good old duct tape around the edges of the plexi, now for sure it’s not going to fall off.
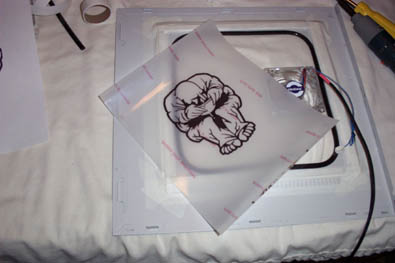
I wanted to use the dremel to etch a picture onto the plexi-glass but due to time constraints decided to make an applique instead (I will do a separate how-to on etching). To make the applique I used a picture I had drawn and ink jet window decal paper. The design could have been in color using this technique but remember that printers don’t print white and also that the image has to be reversed to show up correctly. I printed out the reversed image onto the decal paper (which is really plastic) and cut it out around the edges of my image. Window decal paper runs about $10.00 for 5 sheets so print out the image onto plain paper first and check it for size under the window before printing out the final decal.
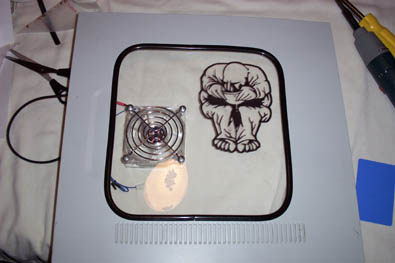
Screw the fan and grill into the window and remember that the fan should be positioned so that it is blowing in. Next take the decal that you cut out and carefully set it into position making sure that the window is clean and dry before you stick it down. If there are bubbles under the decal you can carefully press them out toward the edges to get rid of them. The best way to do this is by using a soft cloth wrapped around your finger. Gently rock your finger back and forth to push the bubble towards the edge. Be careful not to smudge the image. DO NOT use a credit card like you do with a bought applique as it could scrape a hole in the decal and also smudge the image. The Result
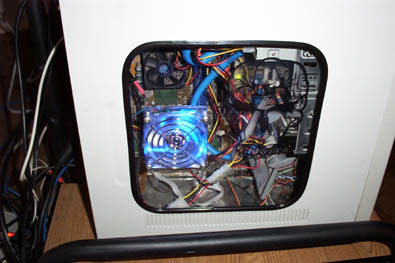
Almost finished. Hook up the fan and put the door back on. Turn on the computer and look at the pretty lighted fan, custom applique and awesome $5.00 window. Have a beer and congratulate yourself on a mod well done.
Happy Modding - Guide written by ARTbyTROY |
|
Disclaimer: This how-to guide is presented for informative purposes only. CaseModGod.com can not and will not be held responsible for damages to or resulting from anything that you may decide to do to your case or hardware and also can not and will not be held responsible for injury to your self or others as a result of attempting any of the things that are shown on this site. Basically you are responsible for your own actions whether said actions were based on information garnered from this site or elsewhere, learn to deal with it. The art work presented in this article is protected under United States and international copyright law. All rights are reserved. Content may not be reproduced, downloaded, disseminated, published, or transferred in any form or by any means, except with the prior written permission of the artist/author. |